How to Setup the Lead Collection Form
Learn how to use your chatbot to start collecting leads and have them automatically emailed to you and your team when they come in.
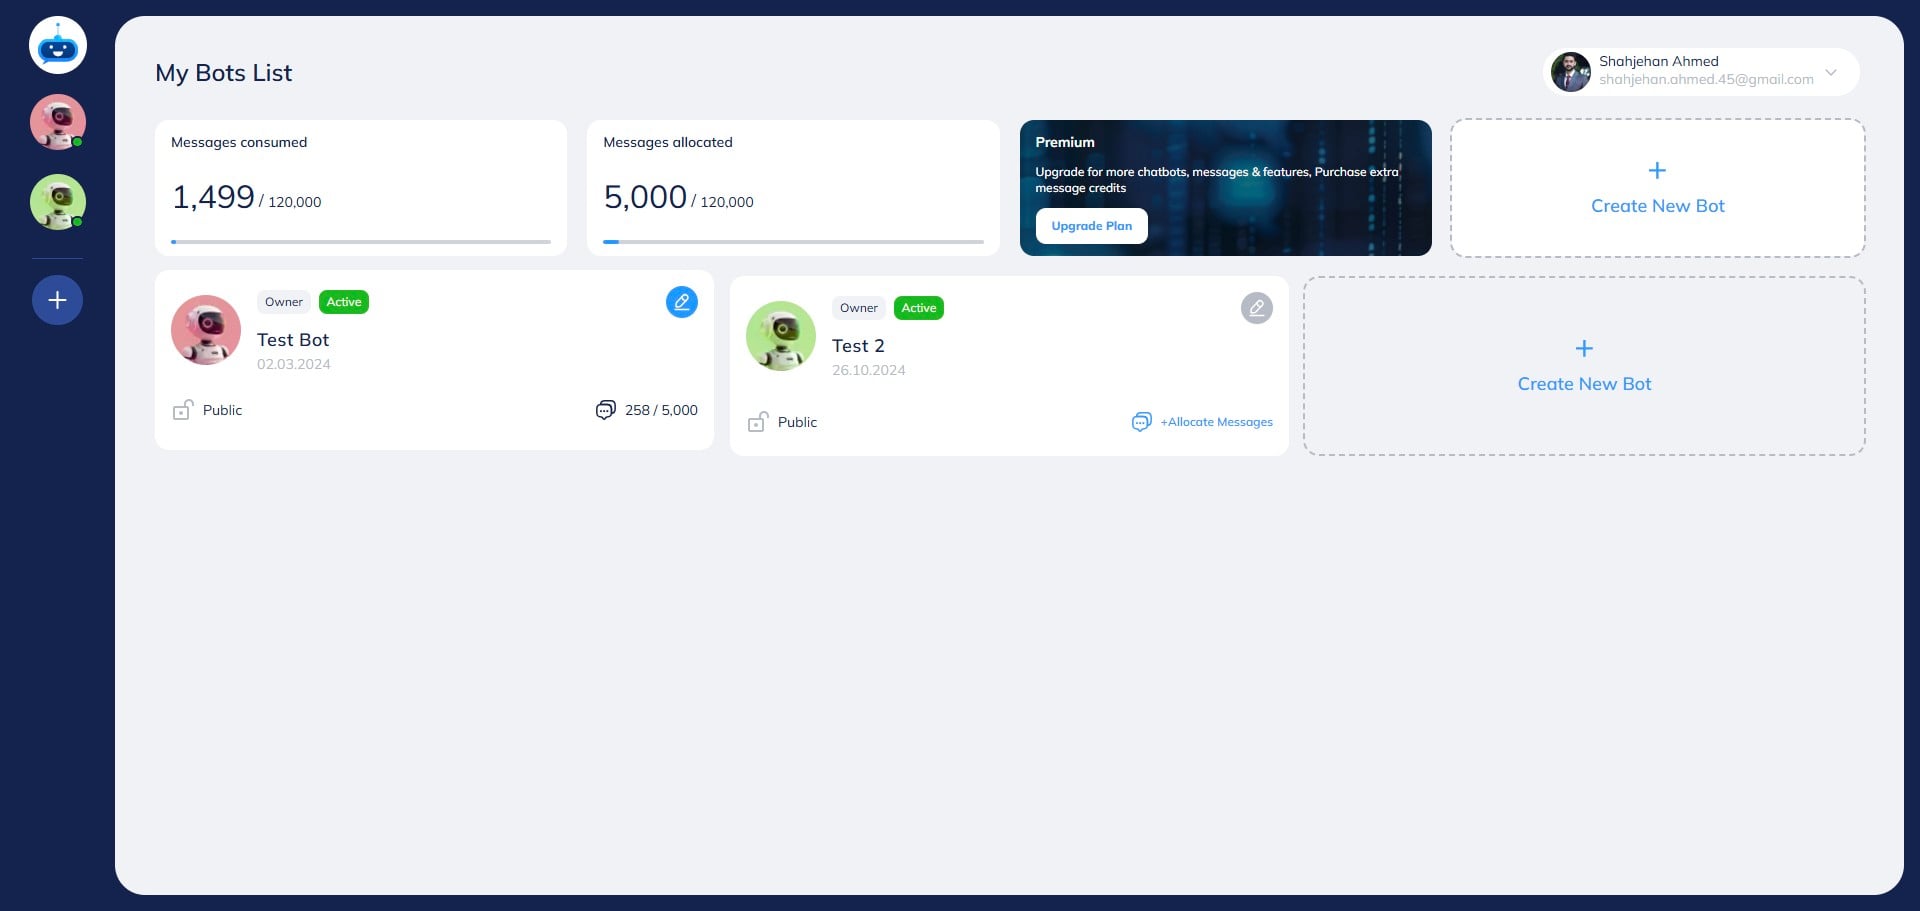
Navigate to https://app.fastbots.ai/
Click on the chatbot to open it.
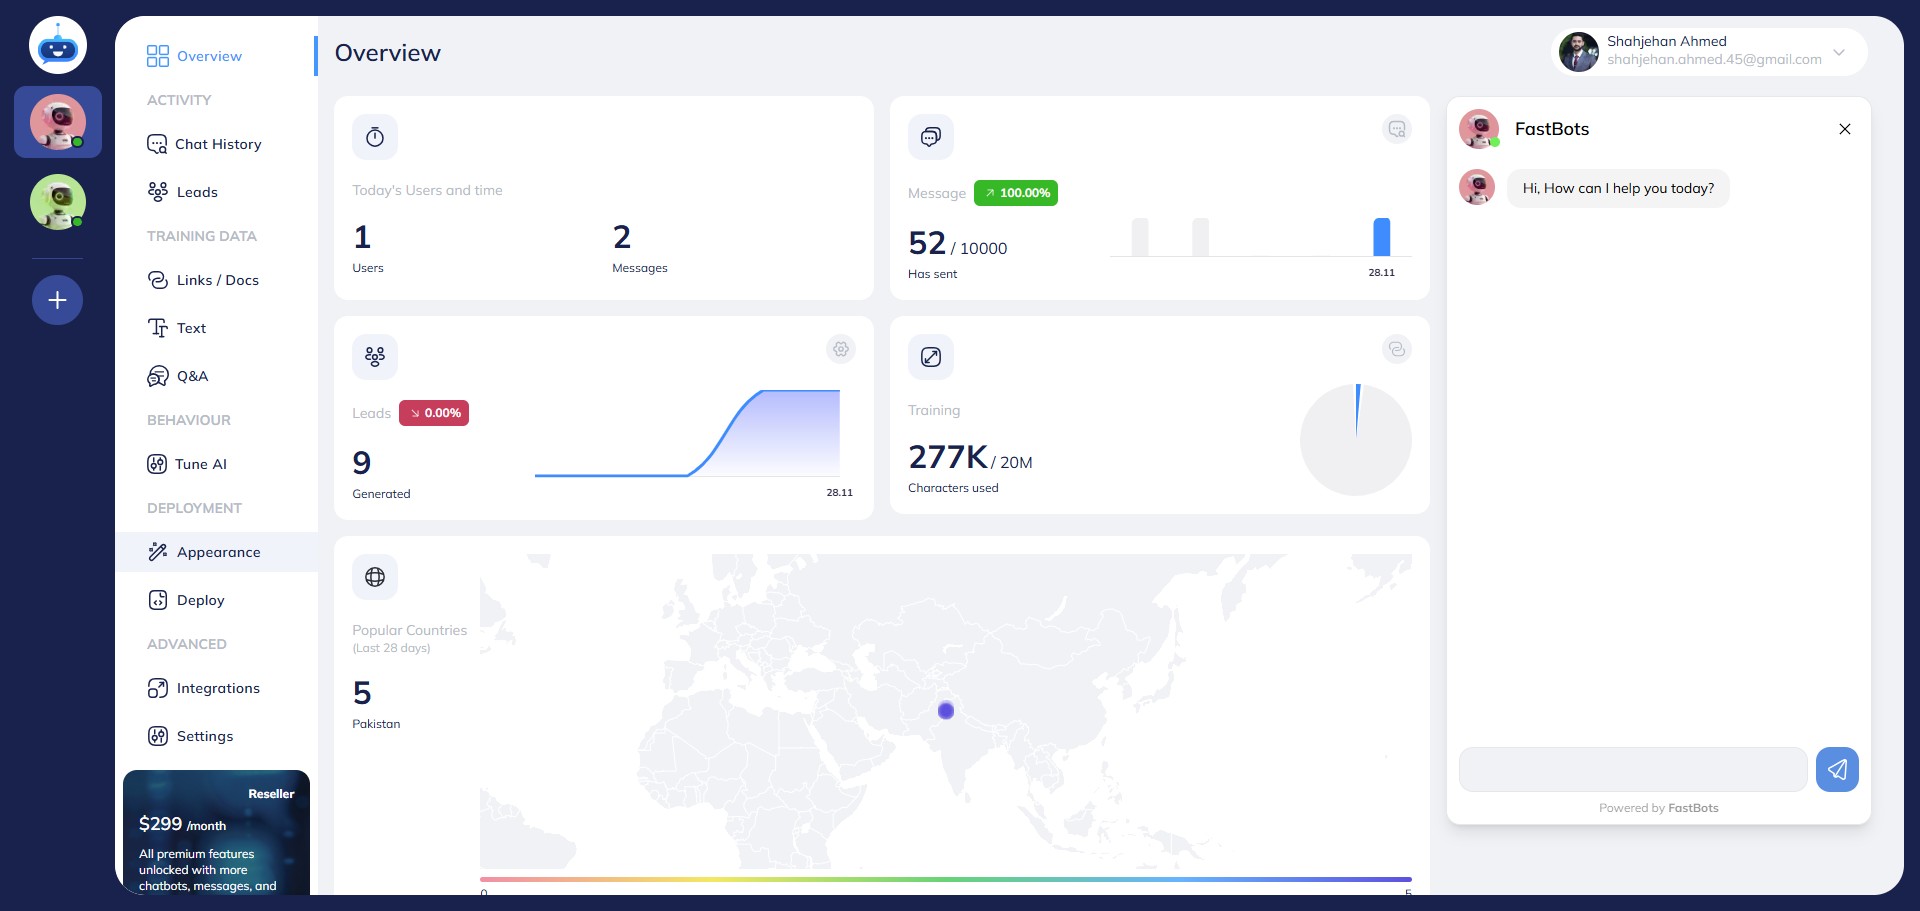
Click on "Appearance"
Scroll down on the "Appearance" page and turn on the "Lead Collection" button. Turn on the toggle.
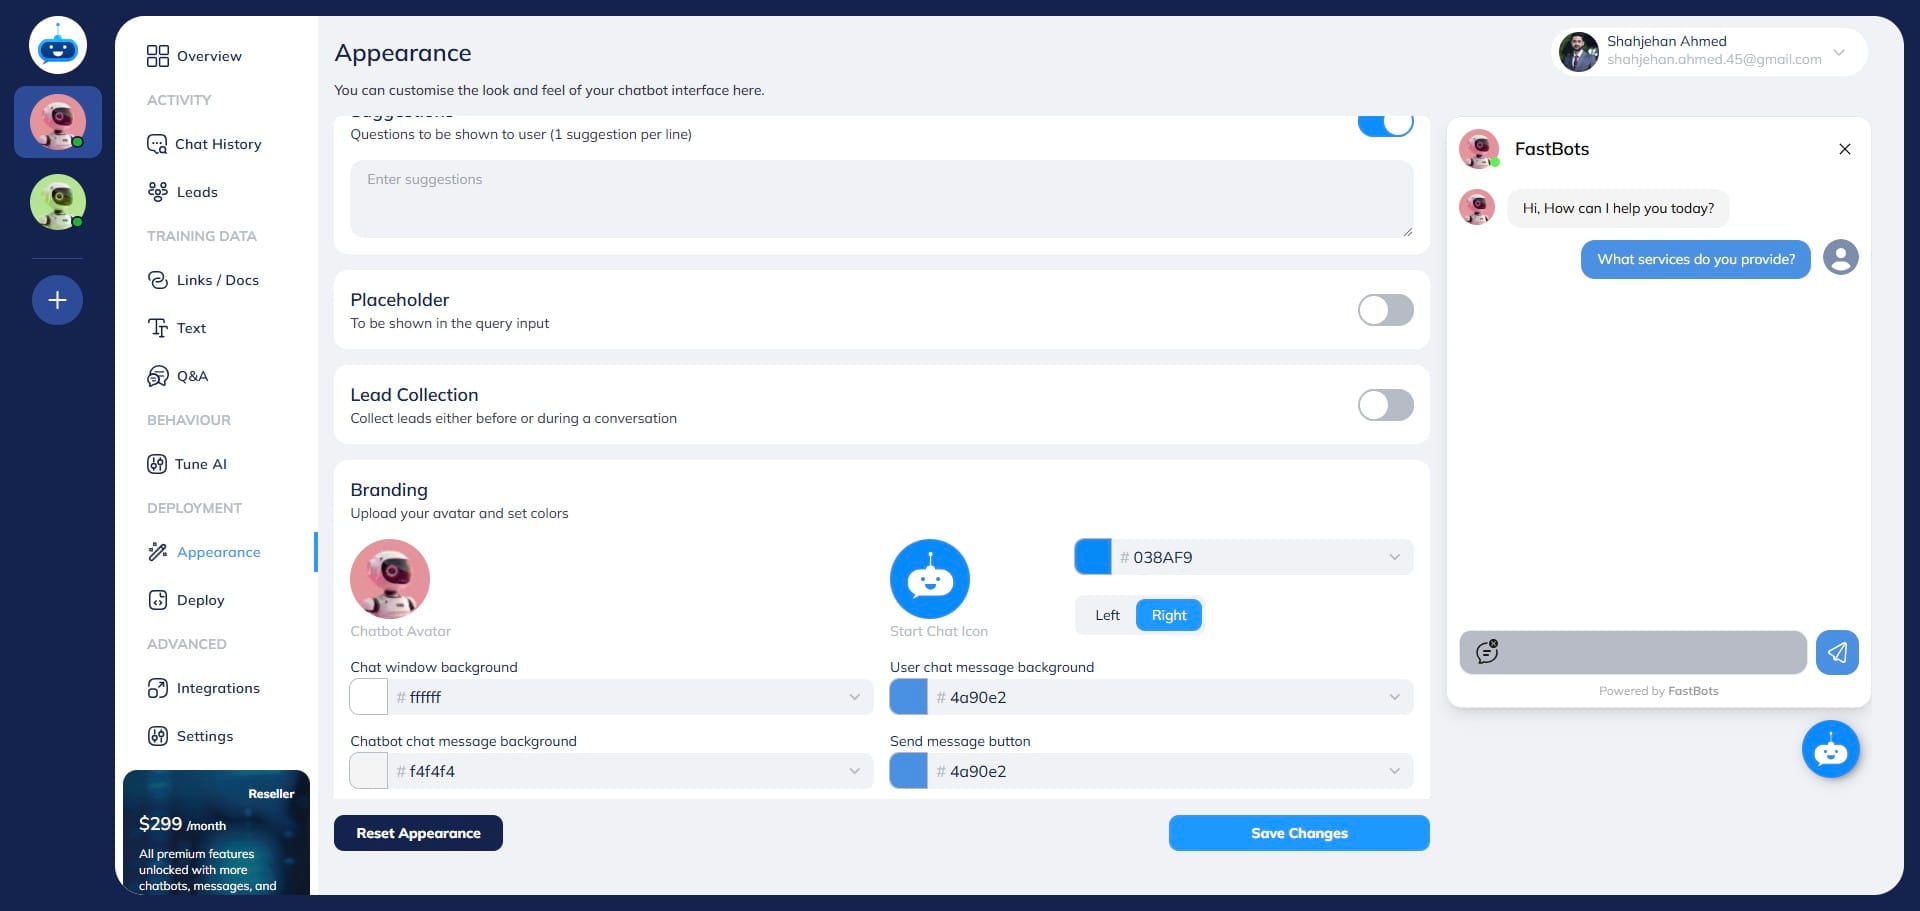
You can add a "Lead Form Title" and also set the number of messages after which you want to show the lead collection form.

You can set the number of messages after which you want the lead form to show. This will help your users to have a conversation with the chatbot before the chatbot asks for their information.
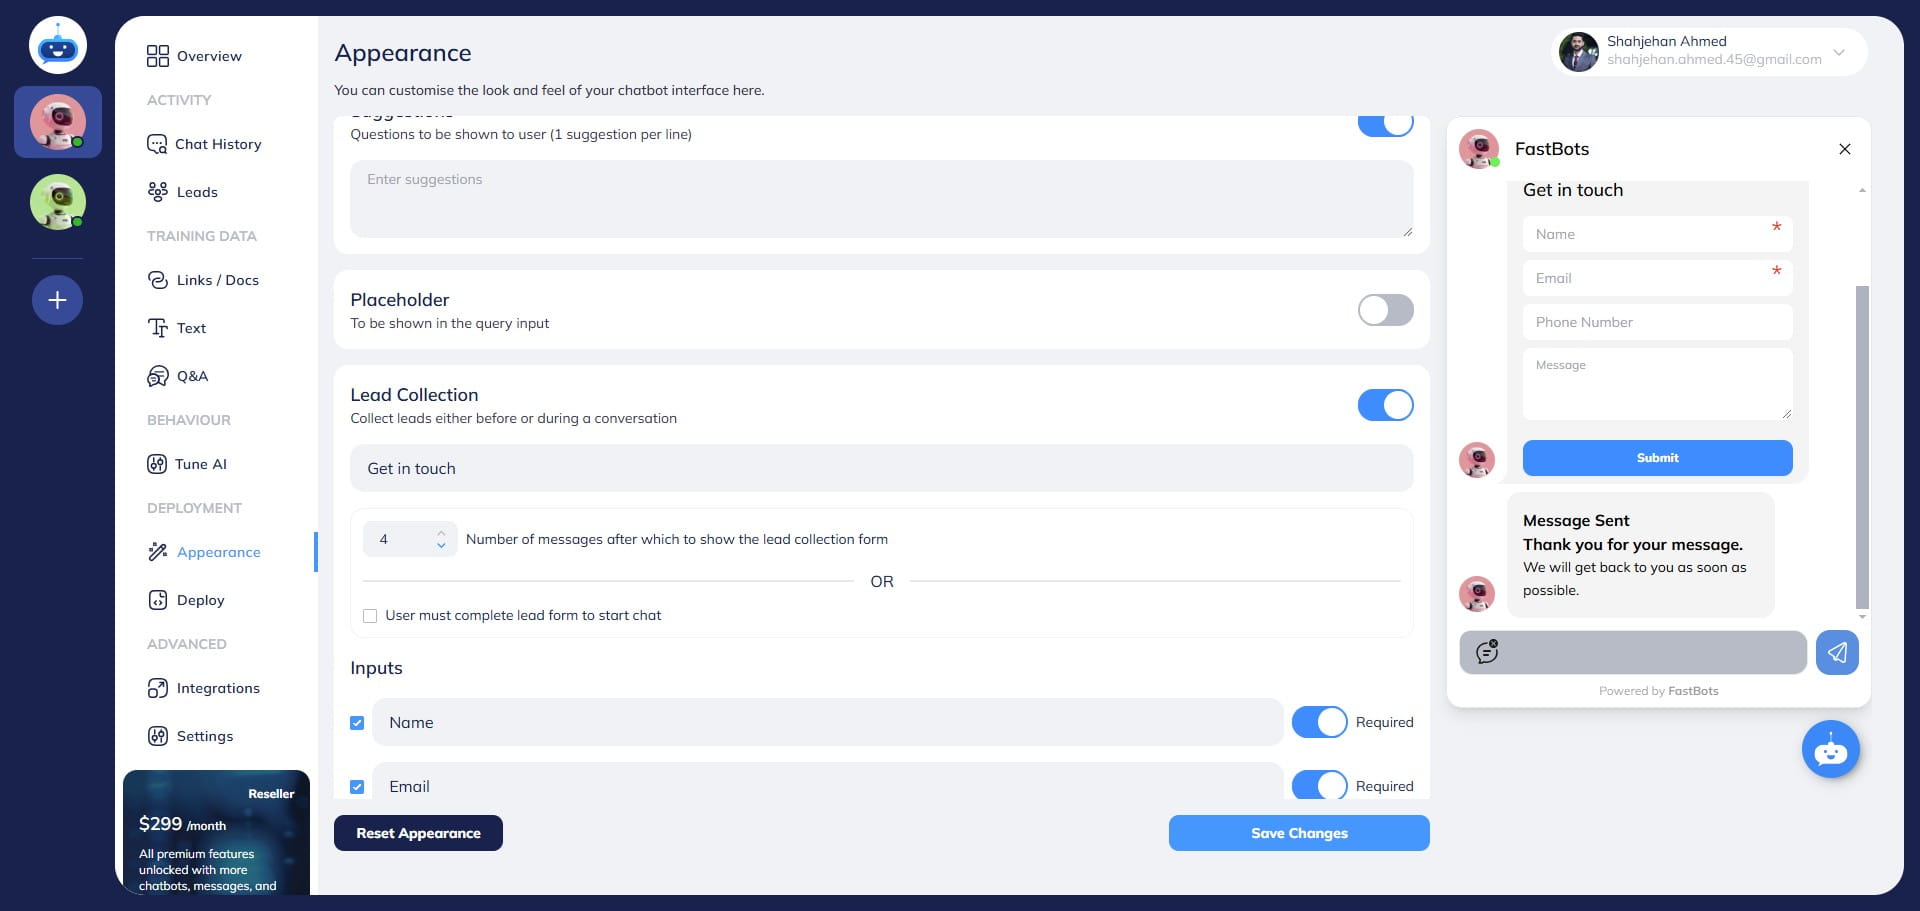
You also have the option to make the lead collection form mandatory for all users by requiring them to complete it at the start of the conversation. If you select this option, users won't be able to interact with the bot until they fill out and submit the form. Once the form is completed, they can proceed to ask the bot their questions.
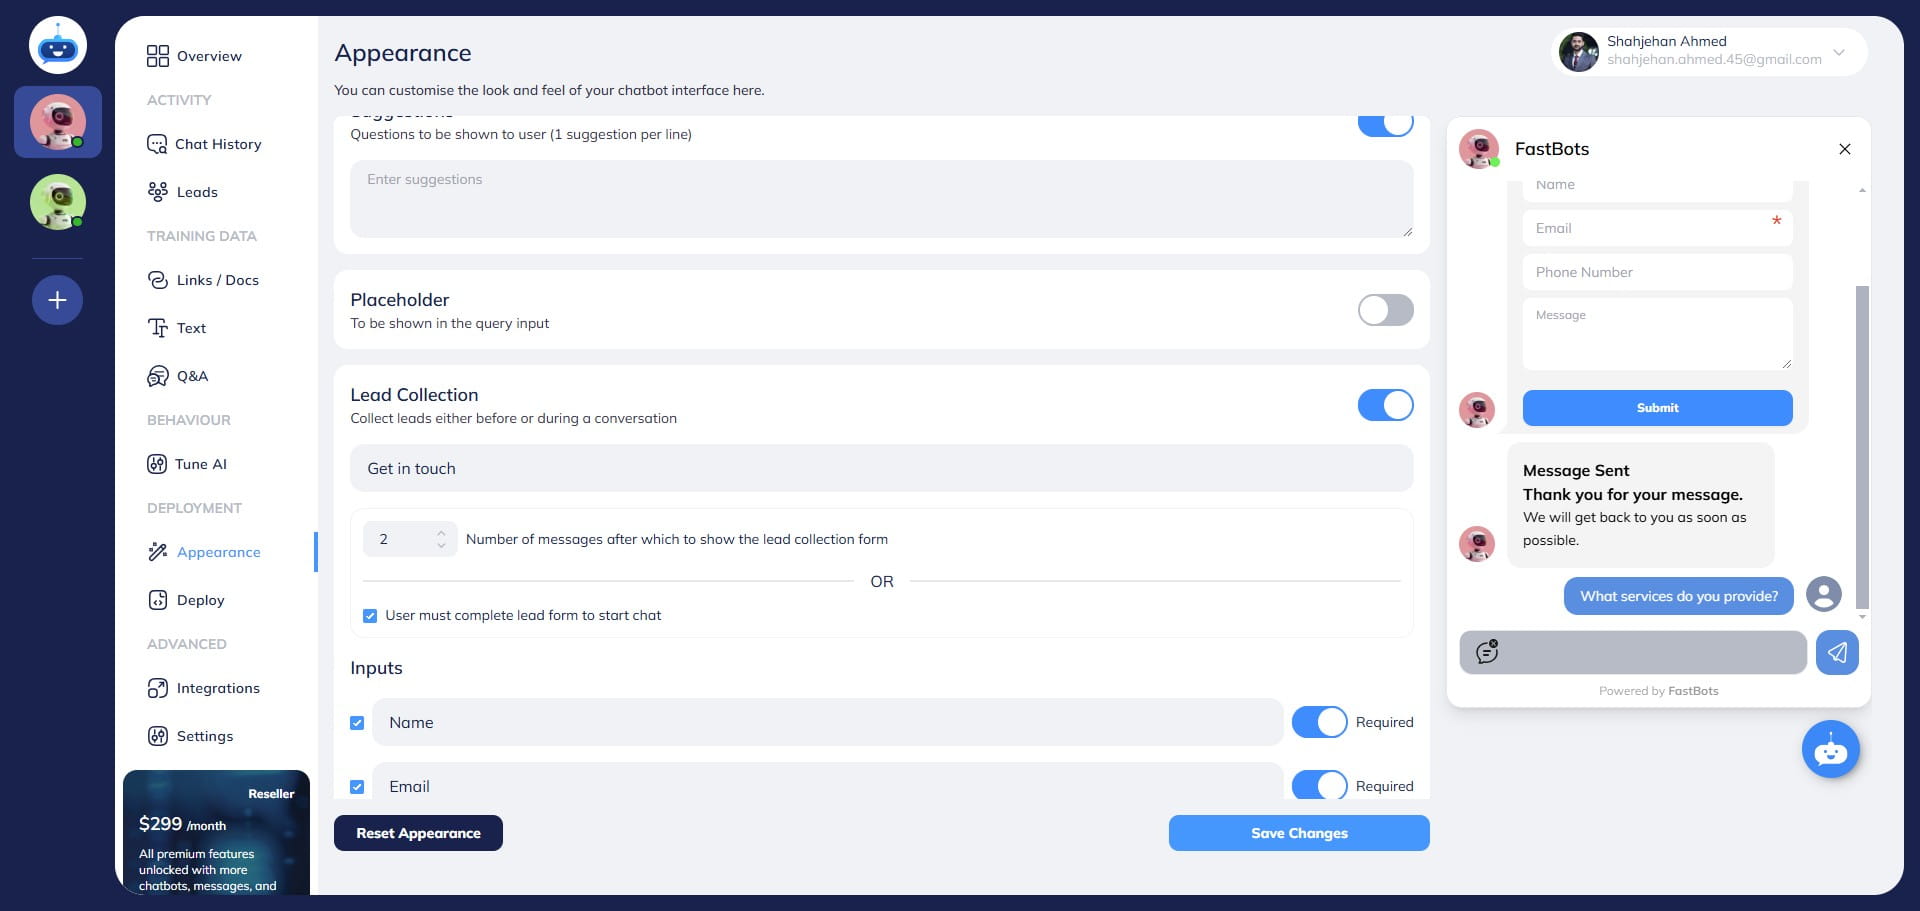
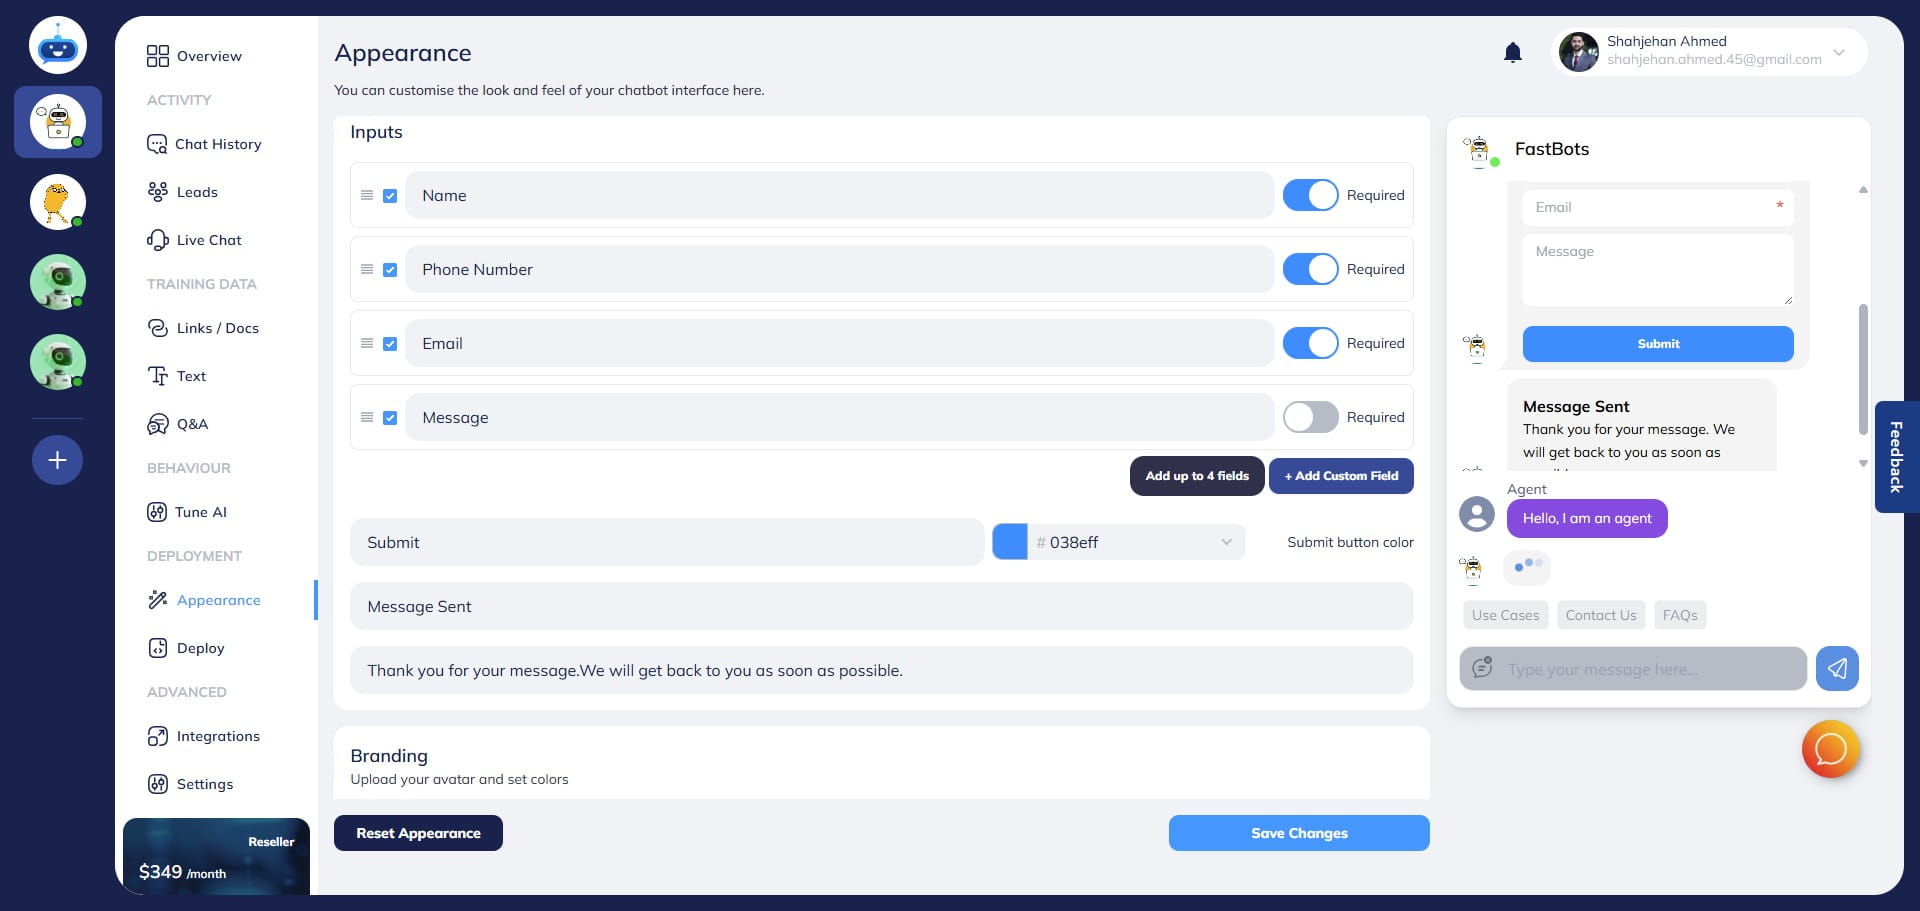
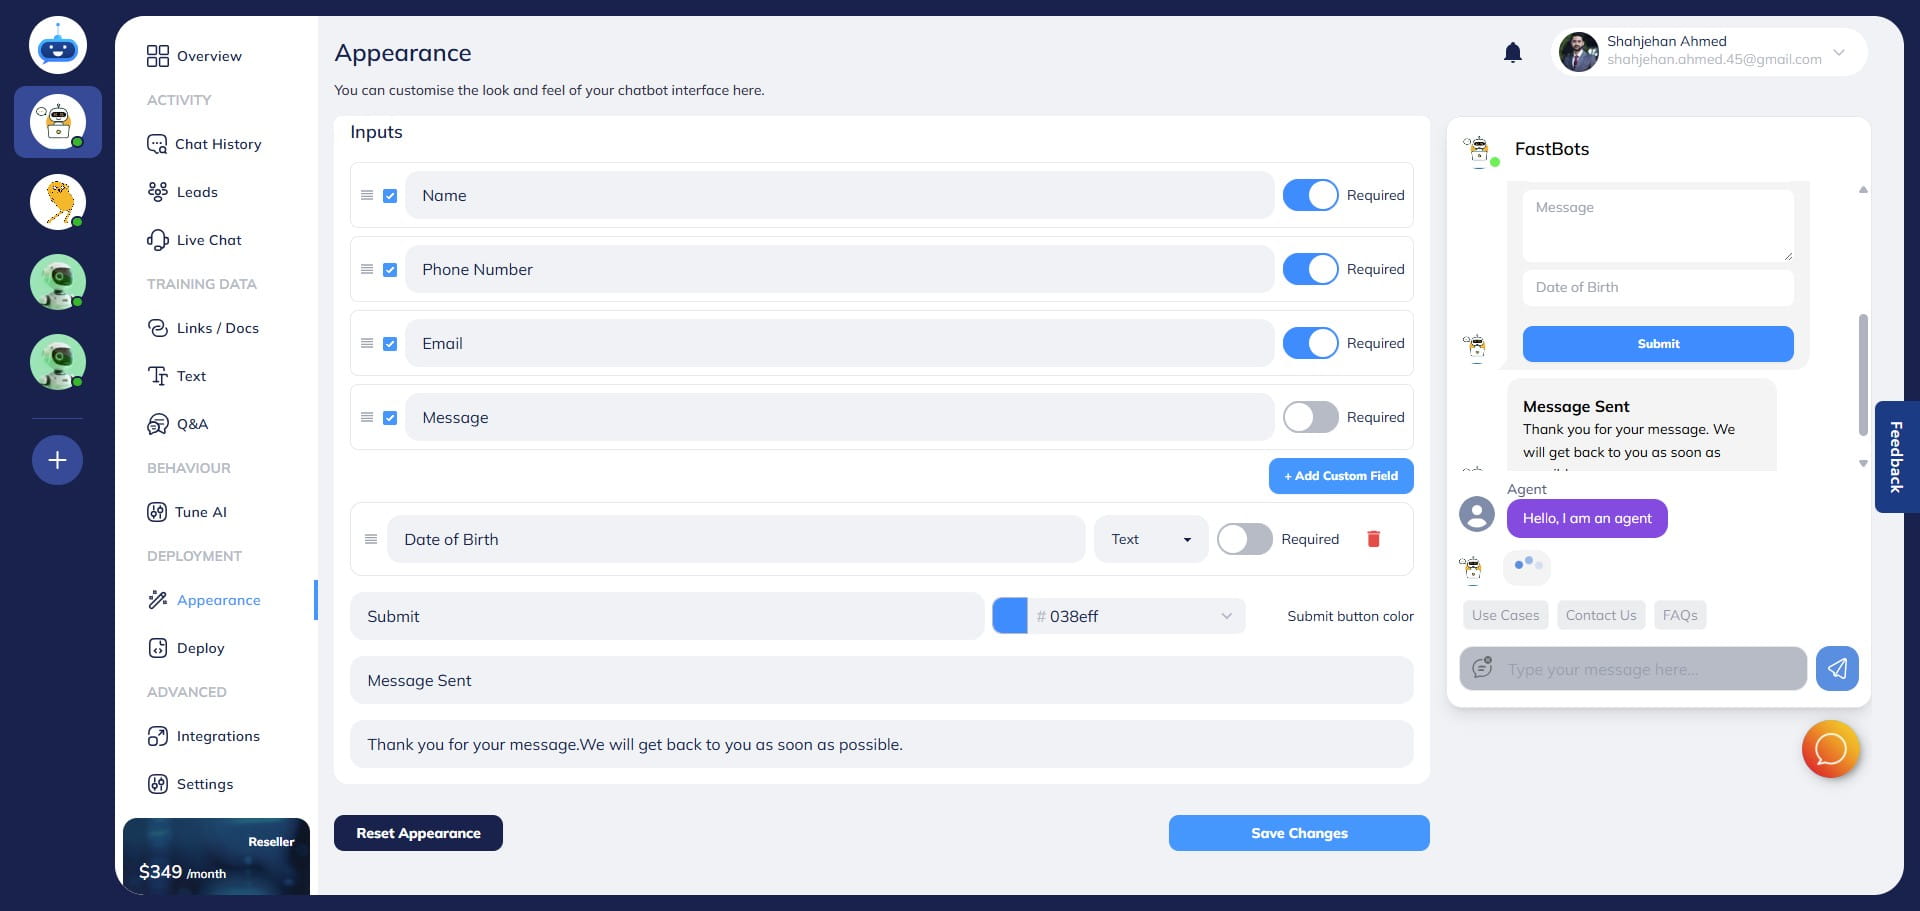
The form will show you 4 standard fields by default You can change the placeholder in the field if you want to and add a text of your own choice.

You can also choose if a field is "Required" to fill the lead collection form or if is it optional. If it's optional, you can keep the "Required" button off, otherwise turn it on.

You also get the option to drag the fields up and down if you want to change the order of these fields.
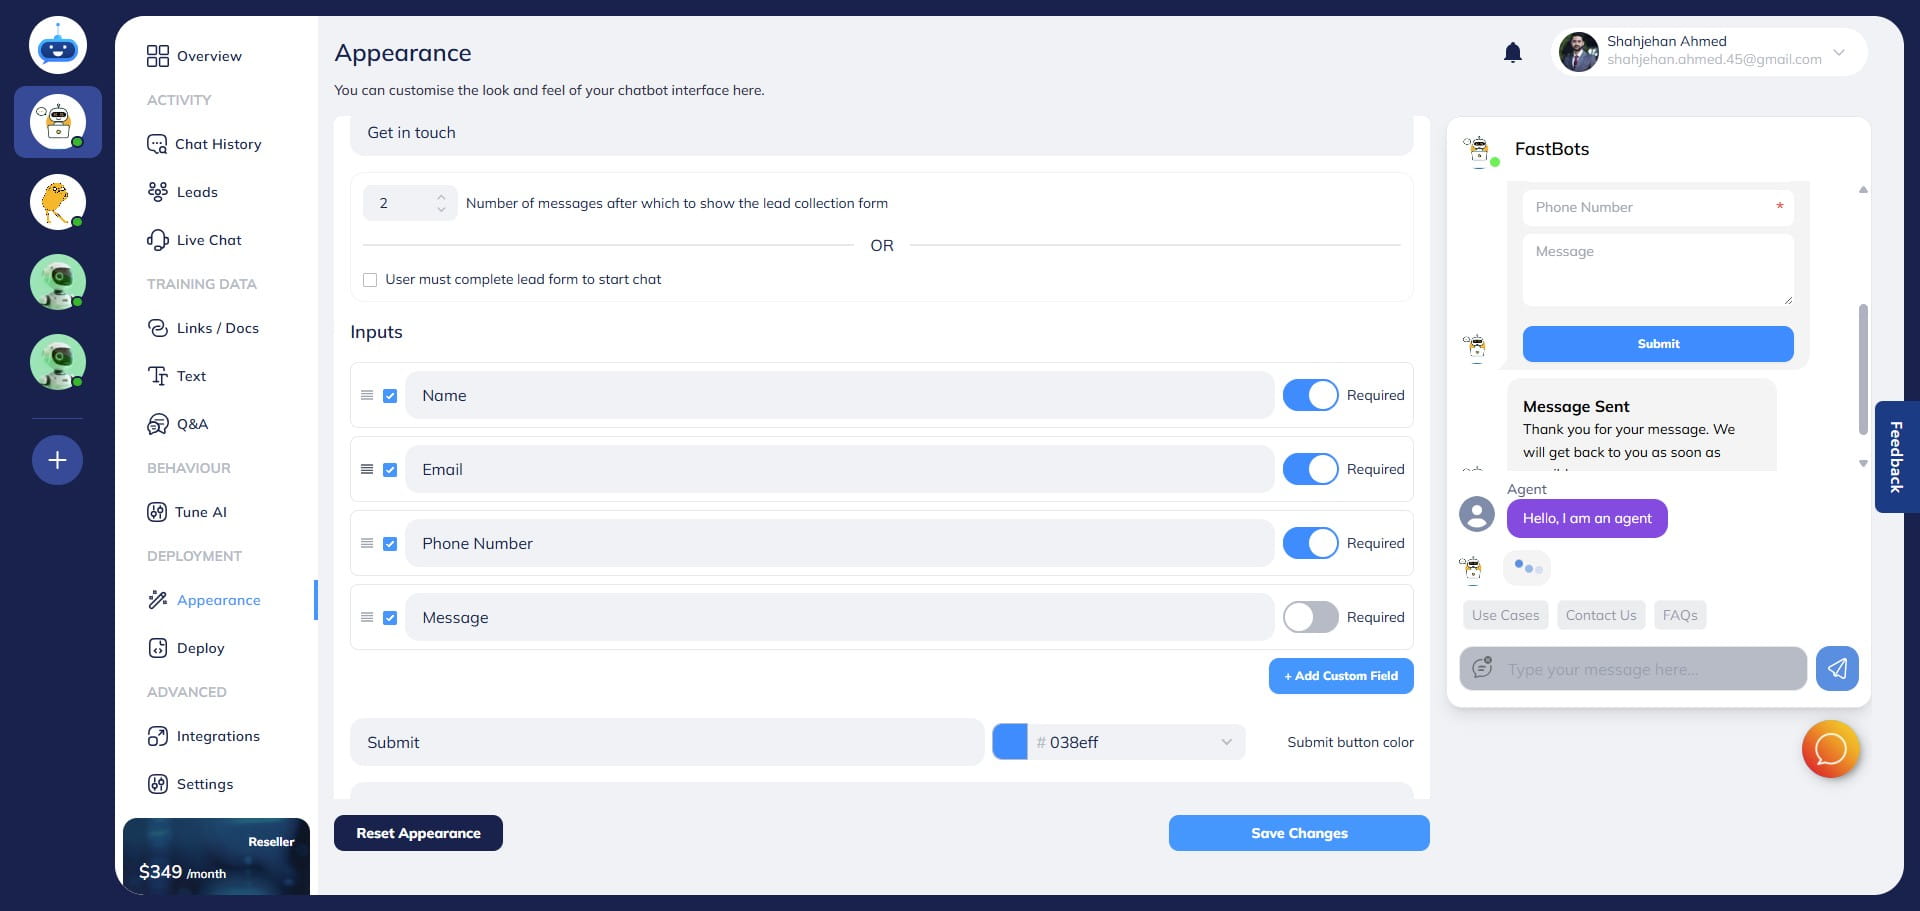
You can also customize the form and add more than 4 fields if required. You can add up to 4 extra fields to the lead collection form. To add a new field, click on "+ Add Custom Field" button.
Add the name in the placeholder.
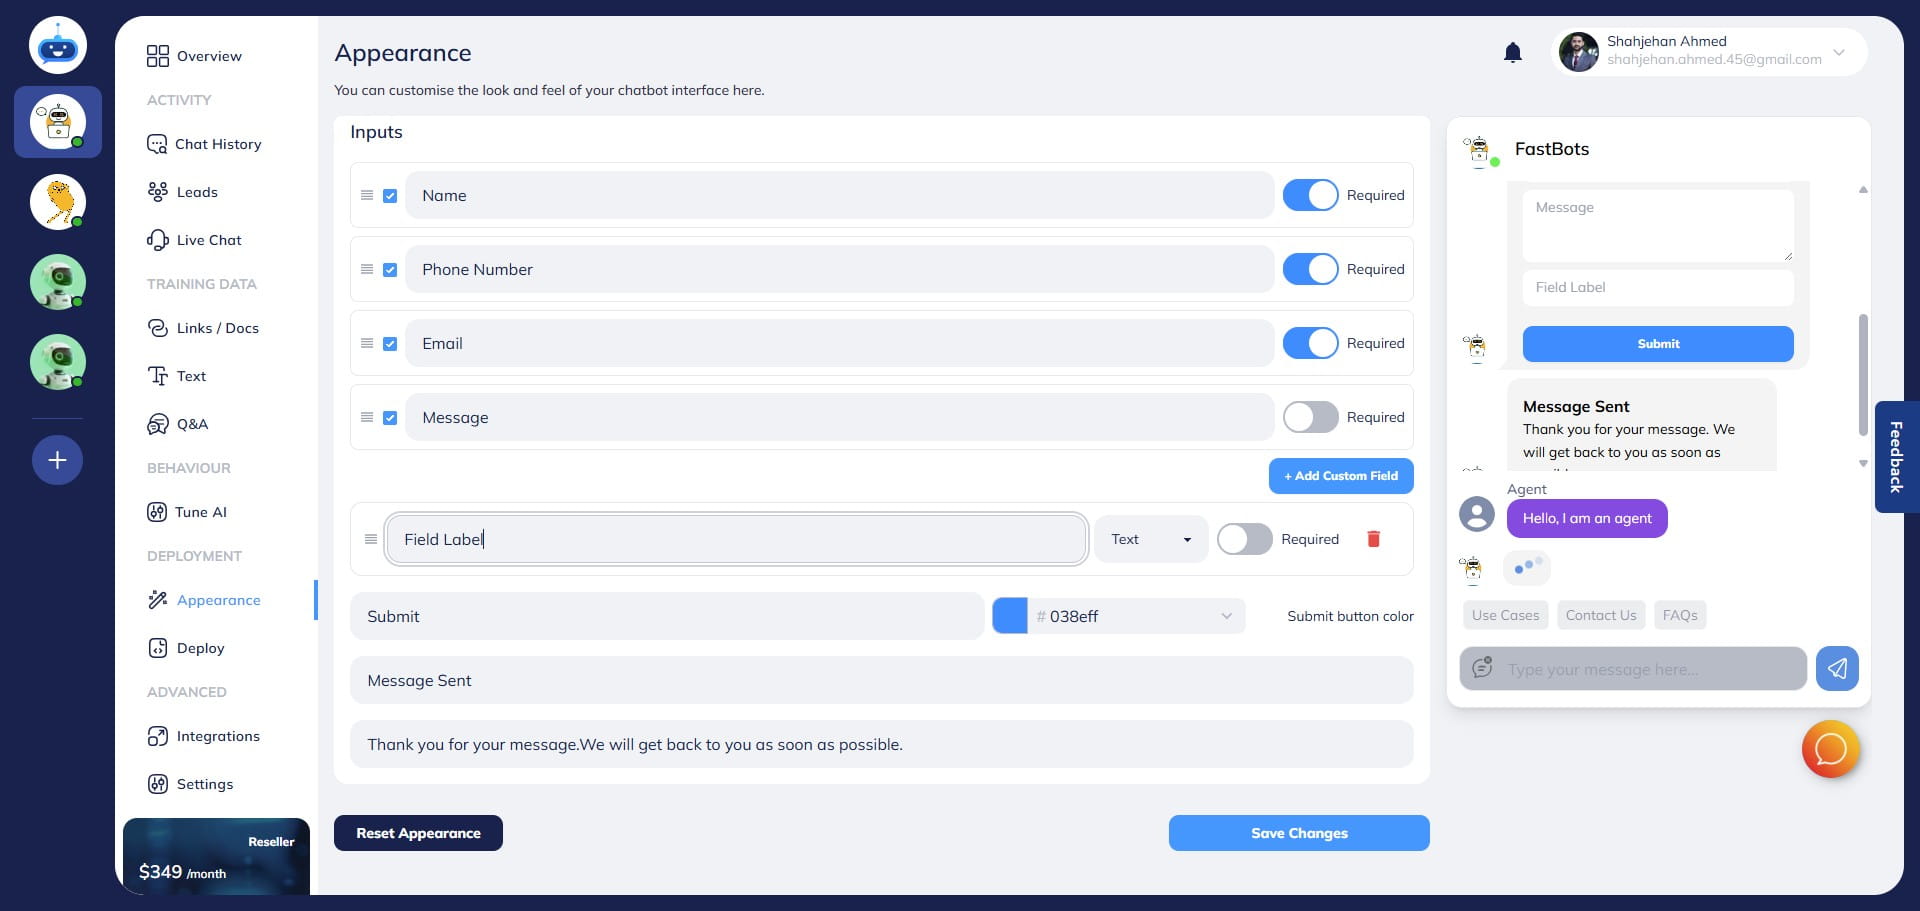
Choose the field type by clicking on the drop down menu.
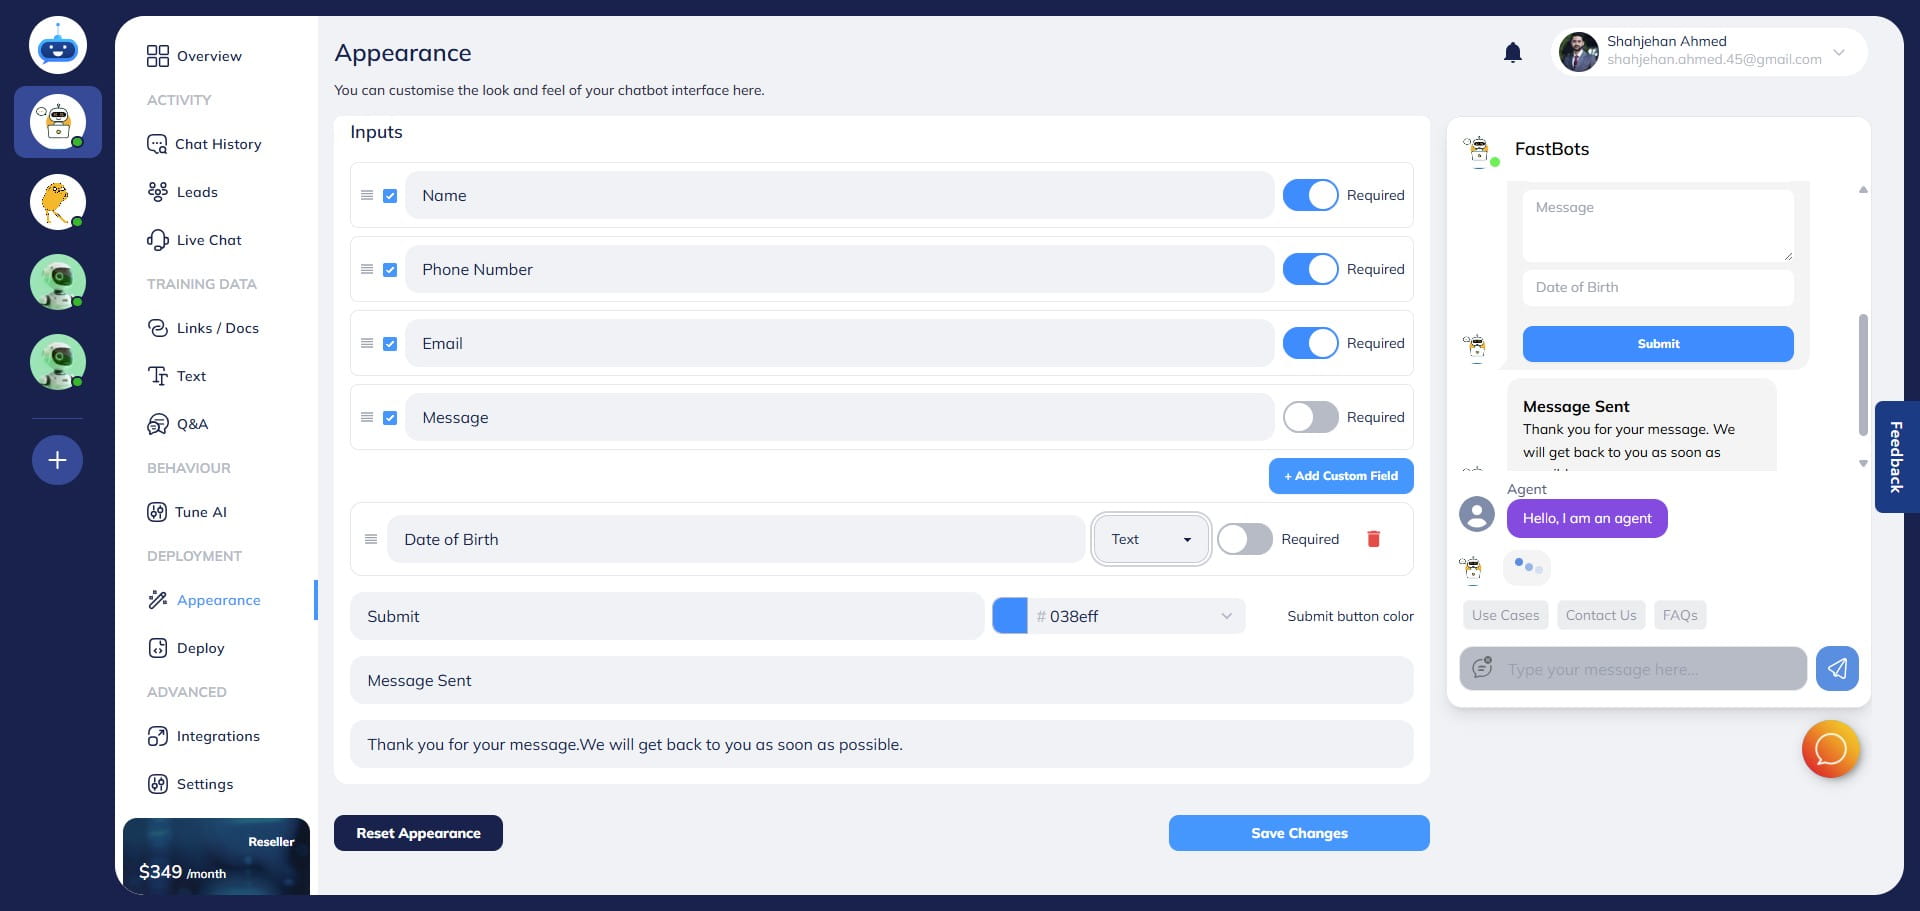
Choose if you want to make it required or option by using this button.
You can also change the submit button name. For example, if you want it to be, "Send Message", you can just type it in the "Submit Button Text" area.

Submit Button color can also be customized by clicking on this icon.
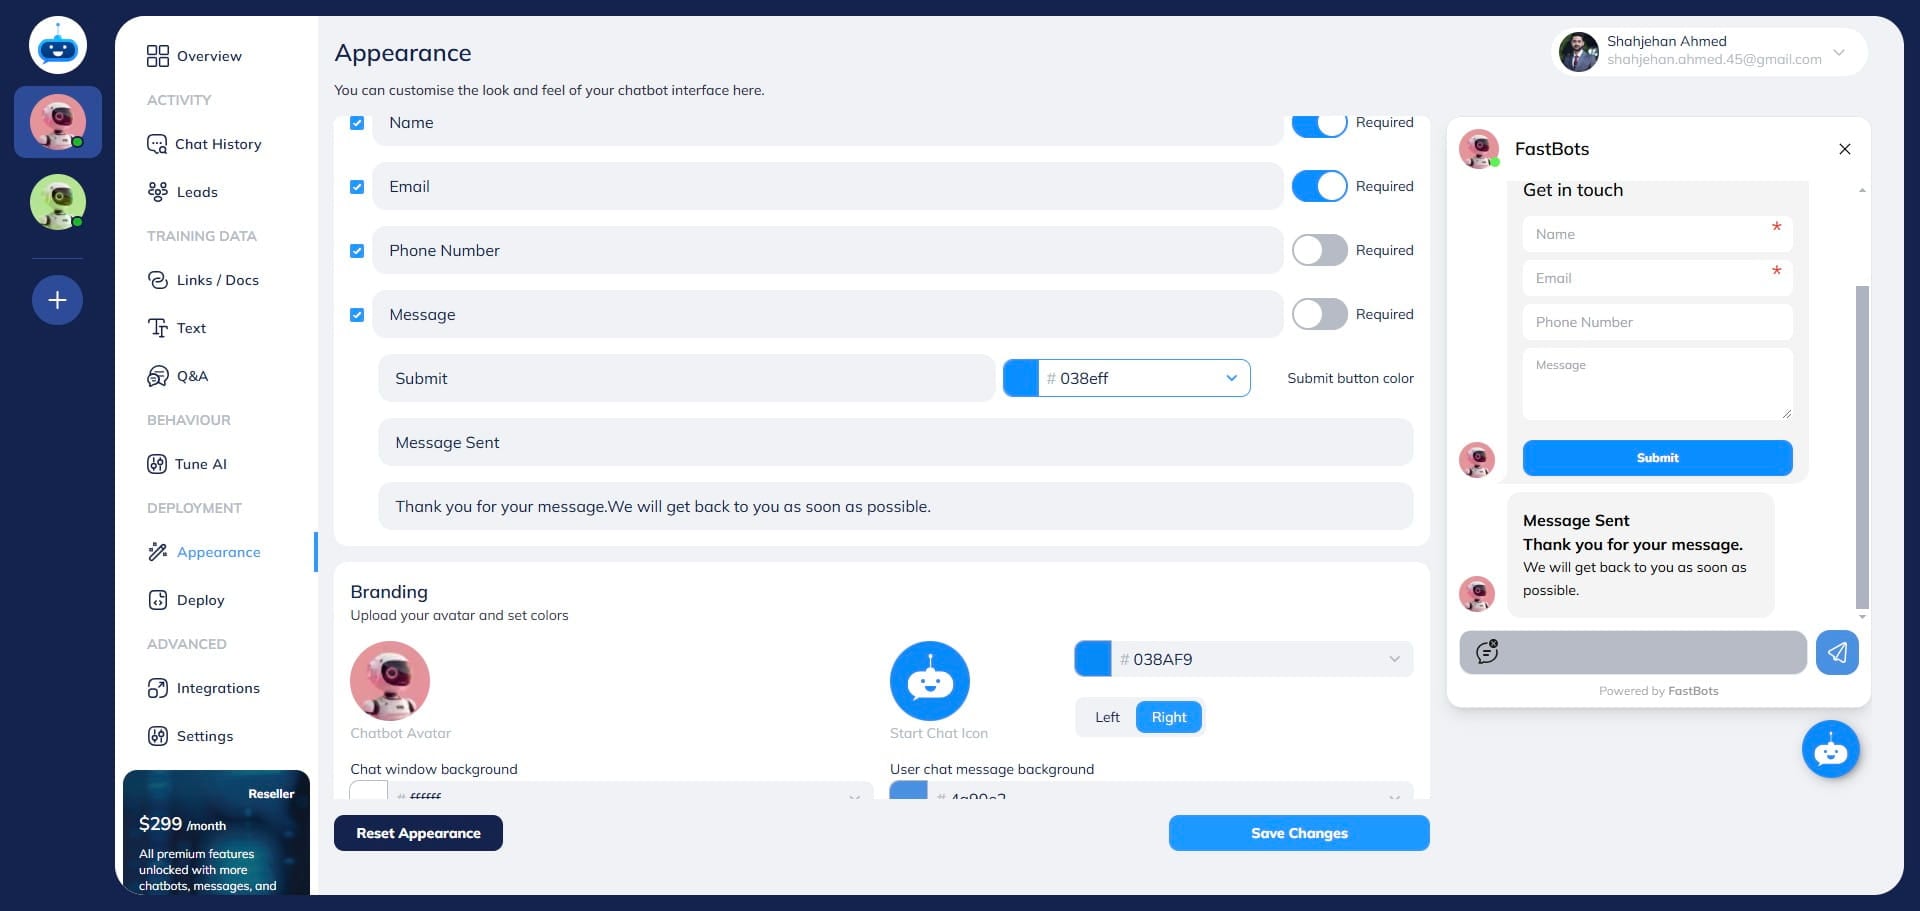
Thank you message title and Thank you message body text can also be changed. You can add a text of your choice or just keep it as it is.

After making all the adjustments, scroll down and click on "Save Changes" button.

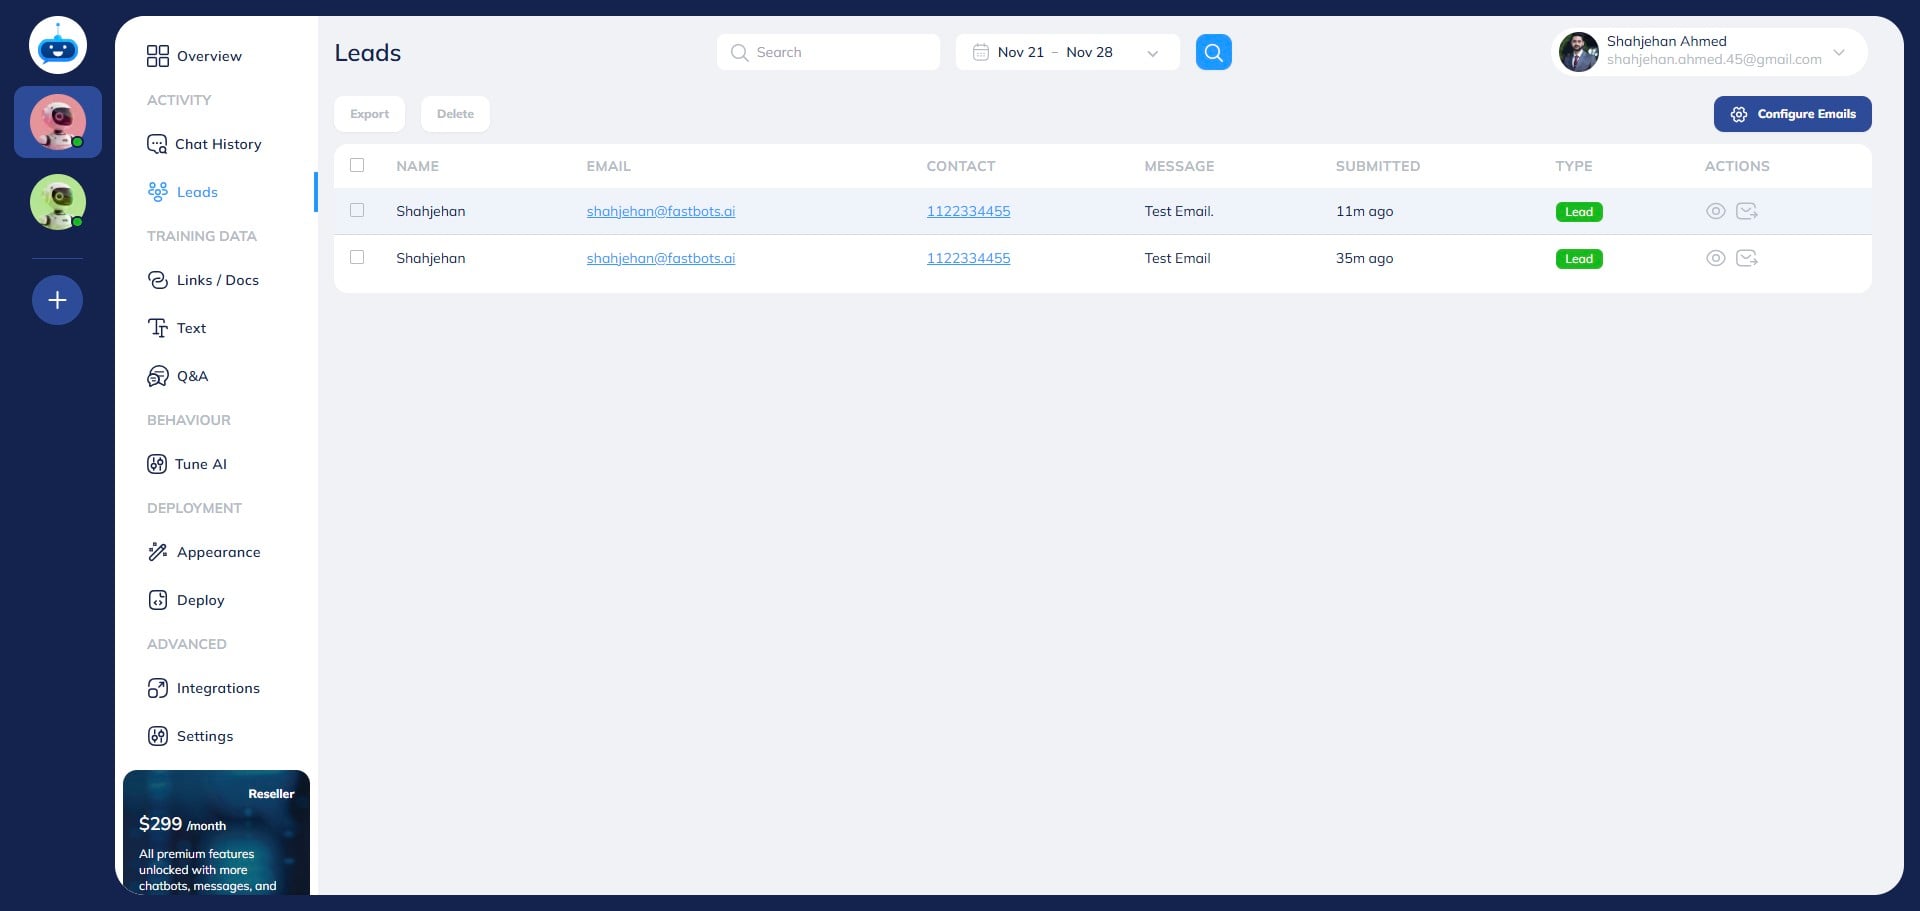
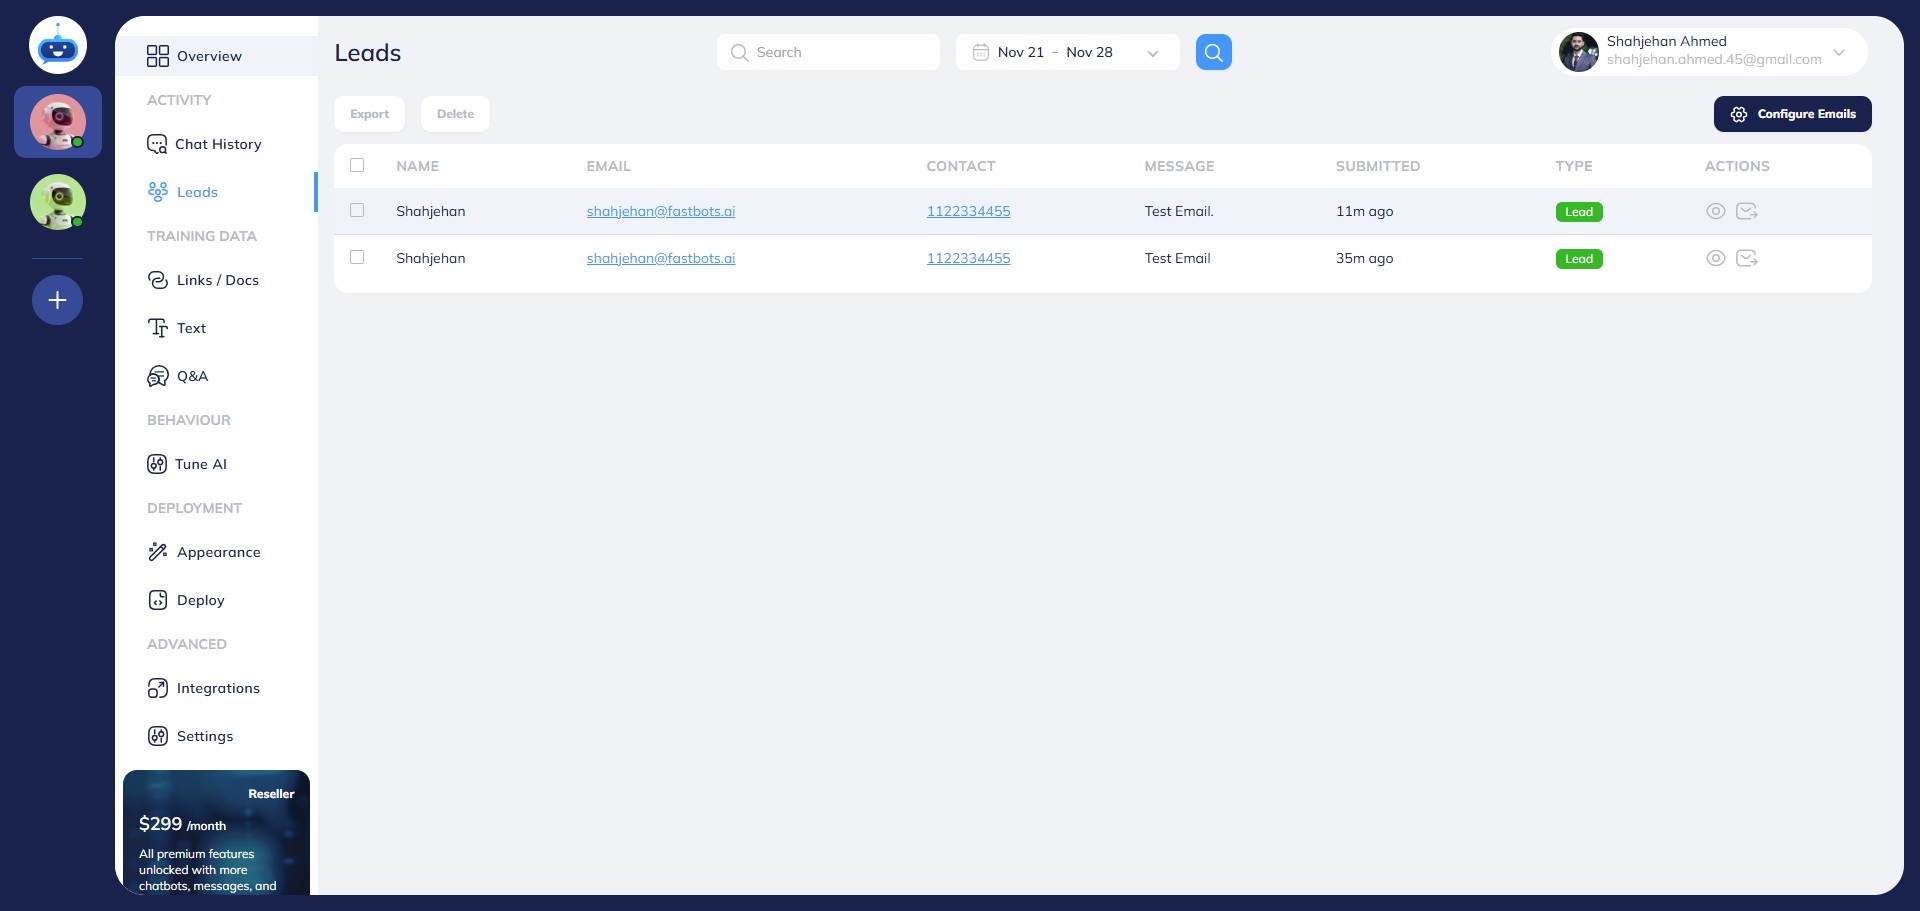
Once you have saved the changes, click on the "Leads" on the left-hand side menu to go to the leads page.
Now the next step is the configure your email where you can receive the leads. So, click on "Configure Emails"
Add your email here. If you want to receive the leads to multiple emails, just separate your emails with a comma.
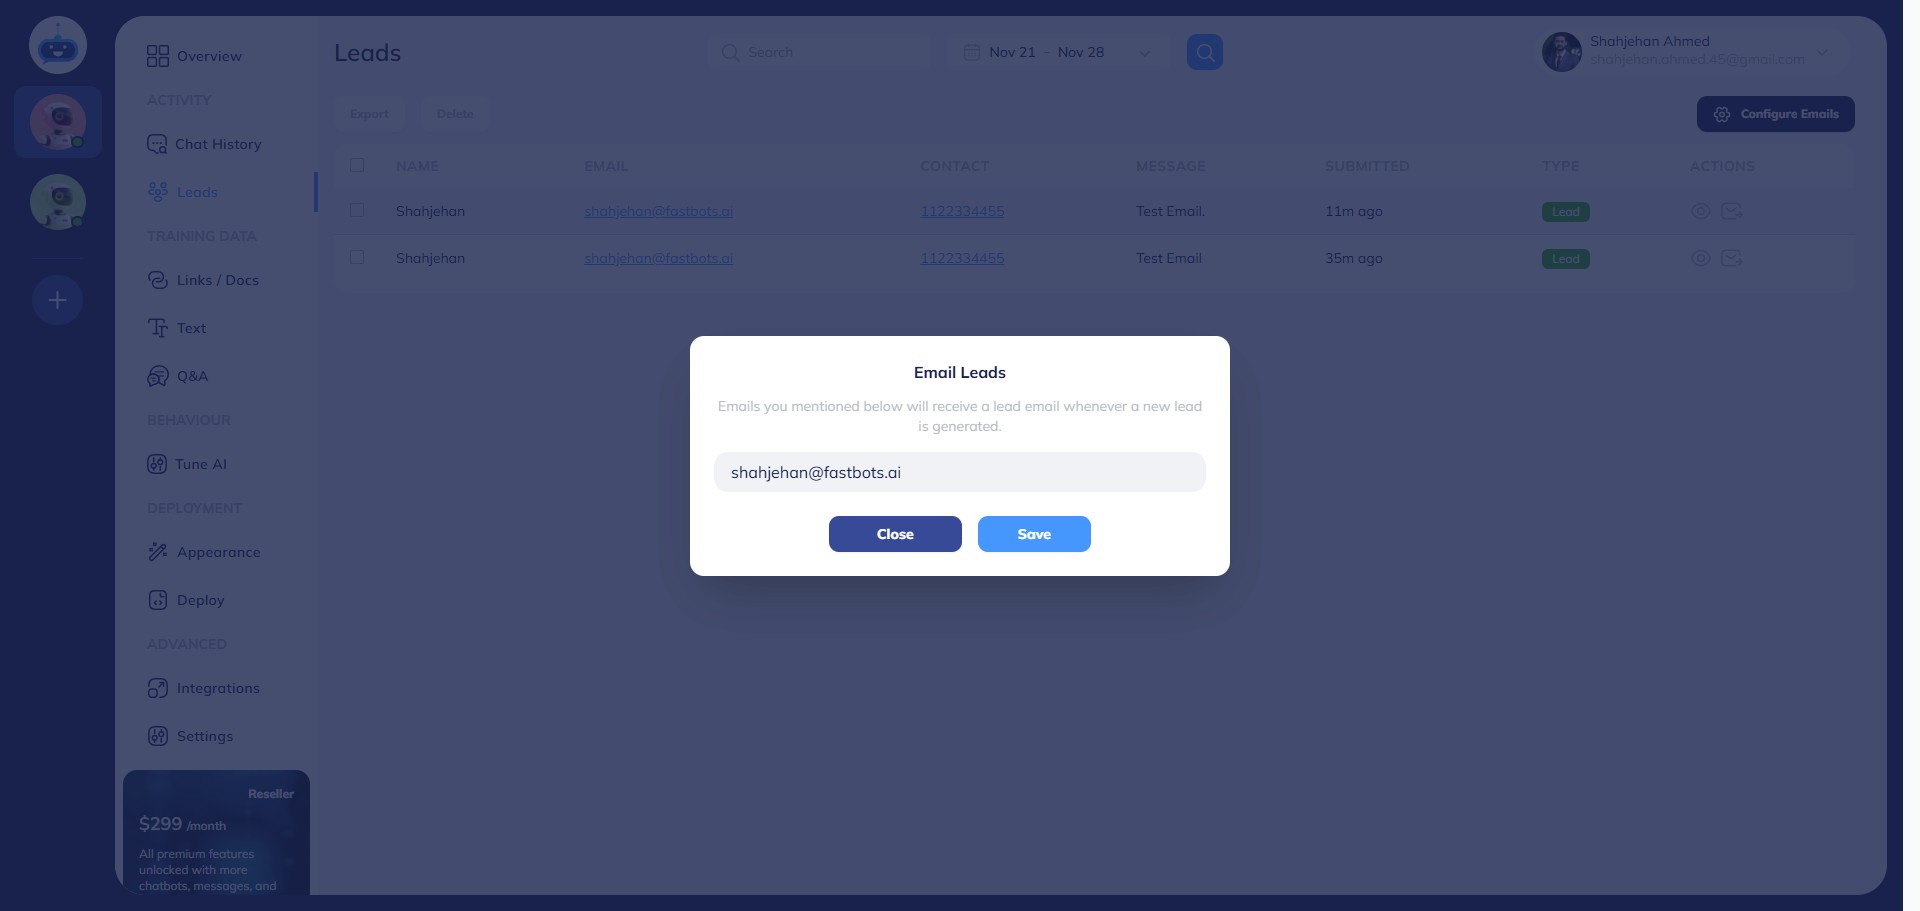
Once you have added the email(s), click on "Save" button.
Now, you have successfully configured the lead collection form of the Chatbot.
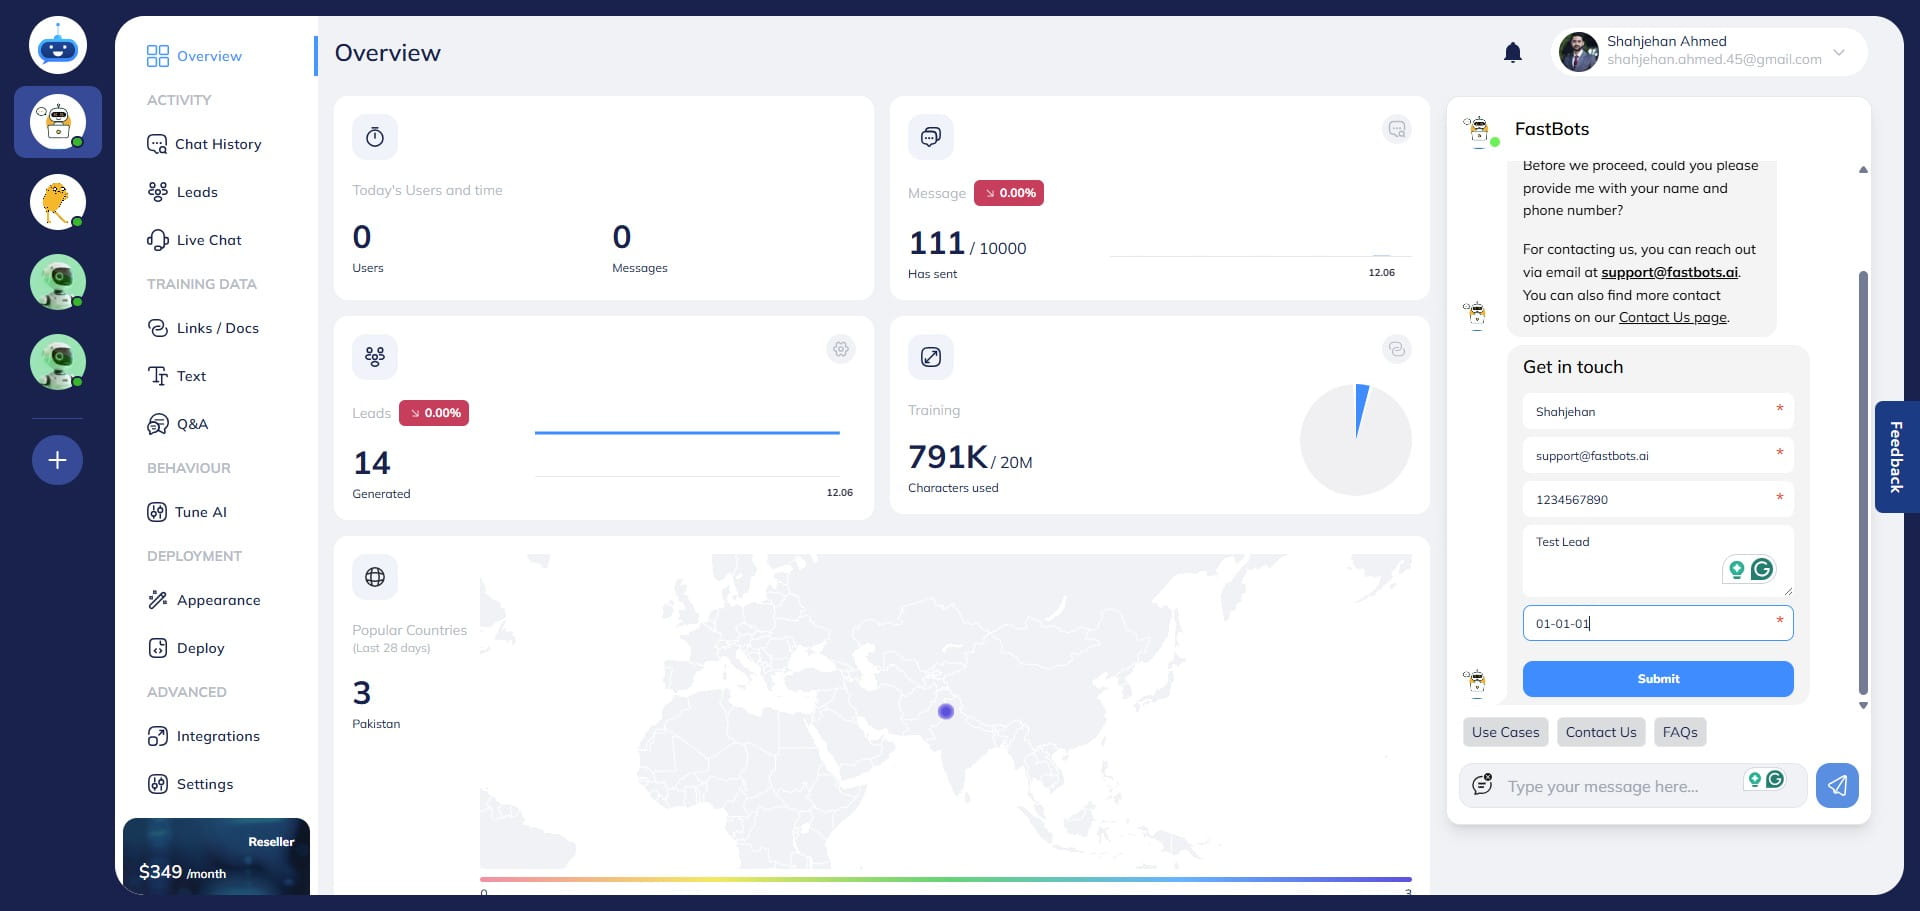
To test the form, click on "Overview" on the left-hand side menu and go to the overview page.
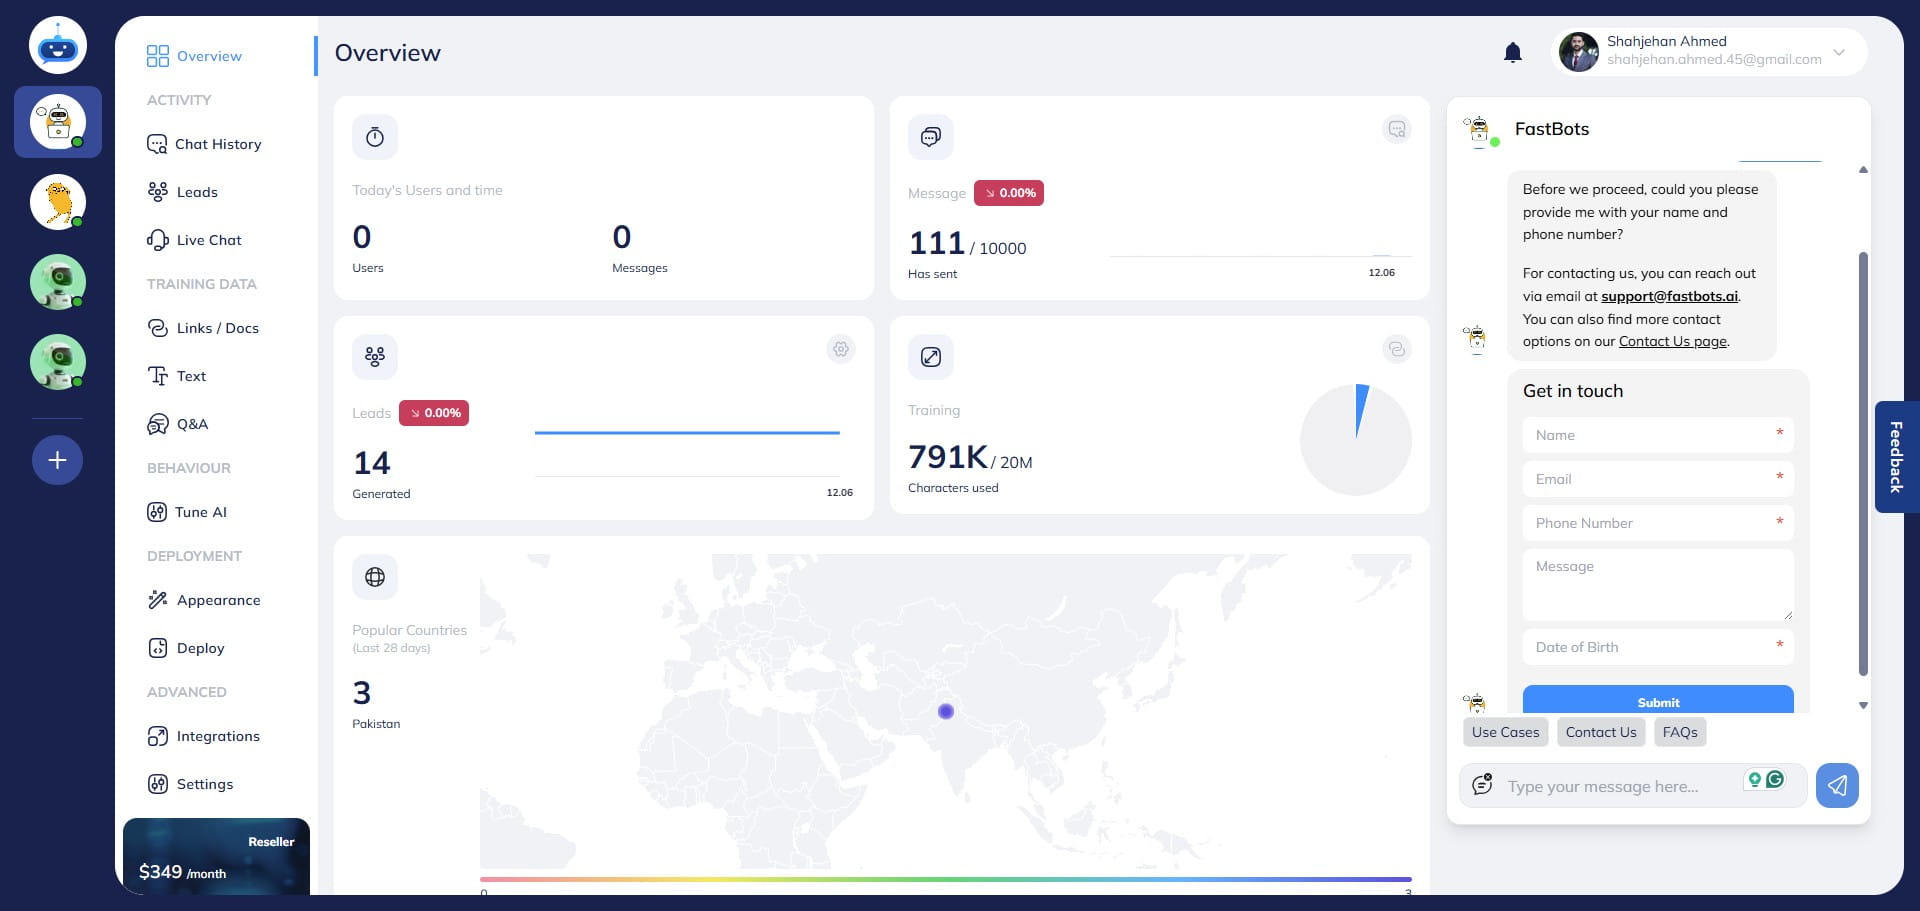
Fill in the leads collection form and click on the "Submit" button.
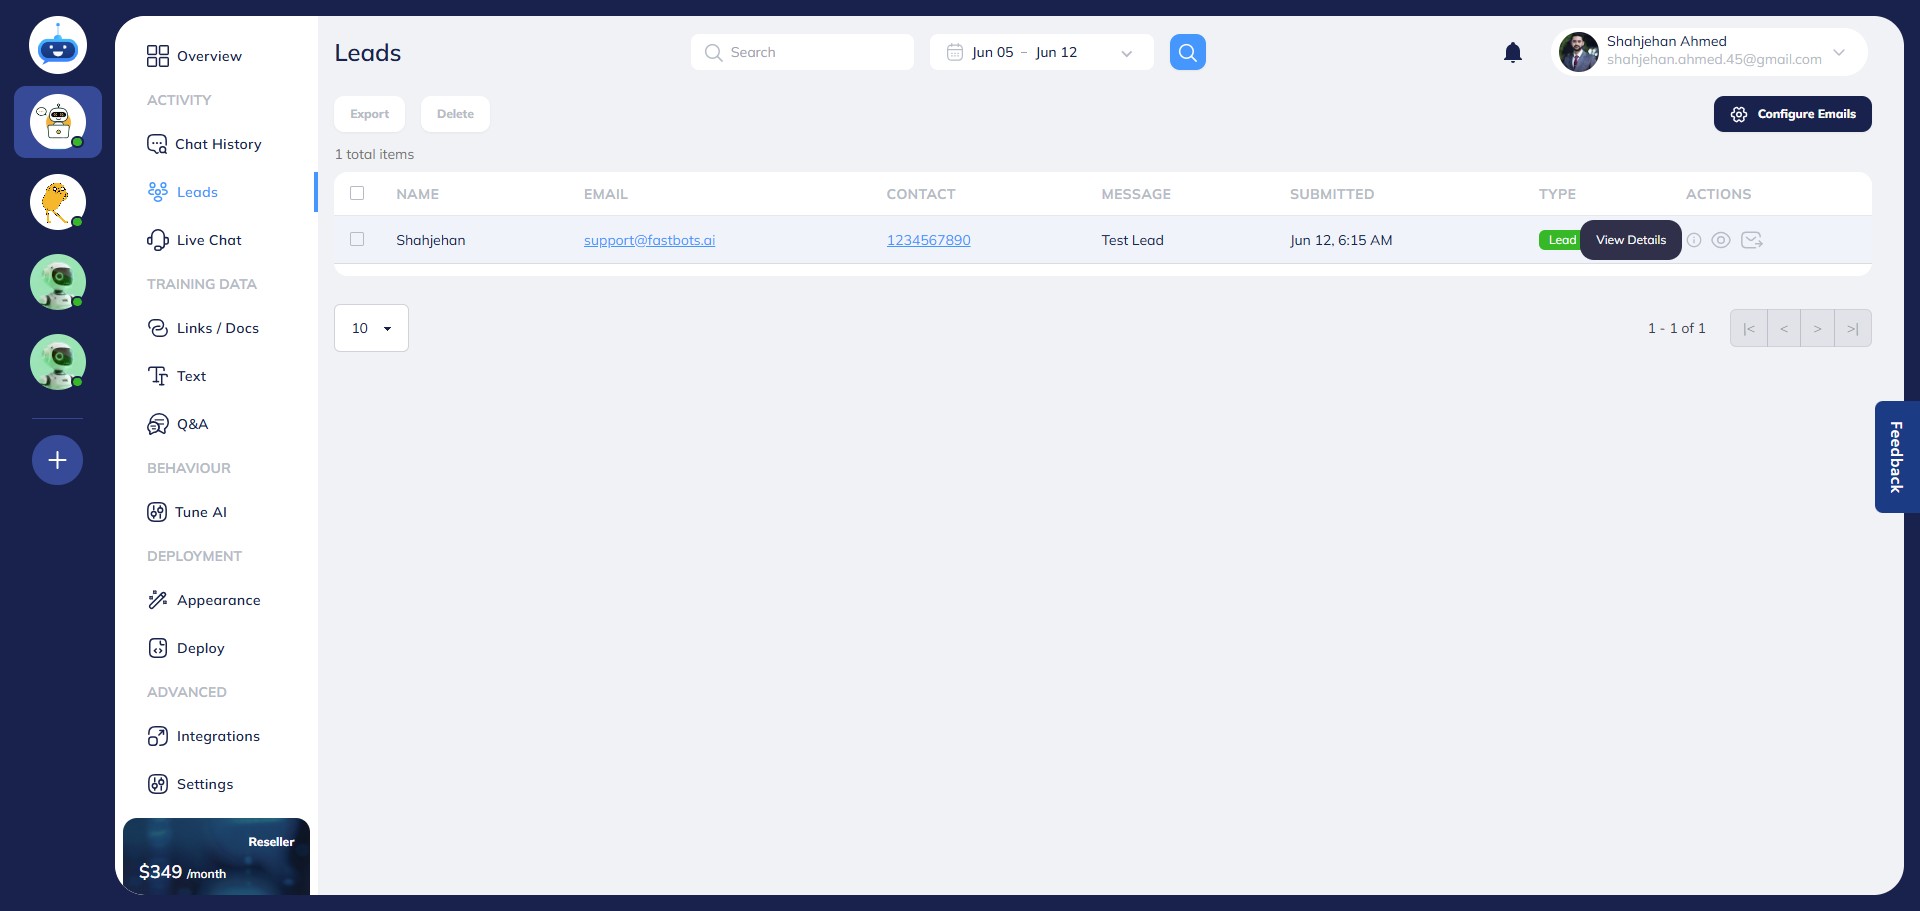
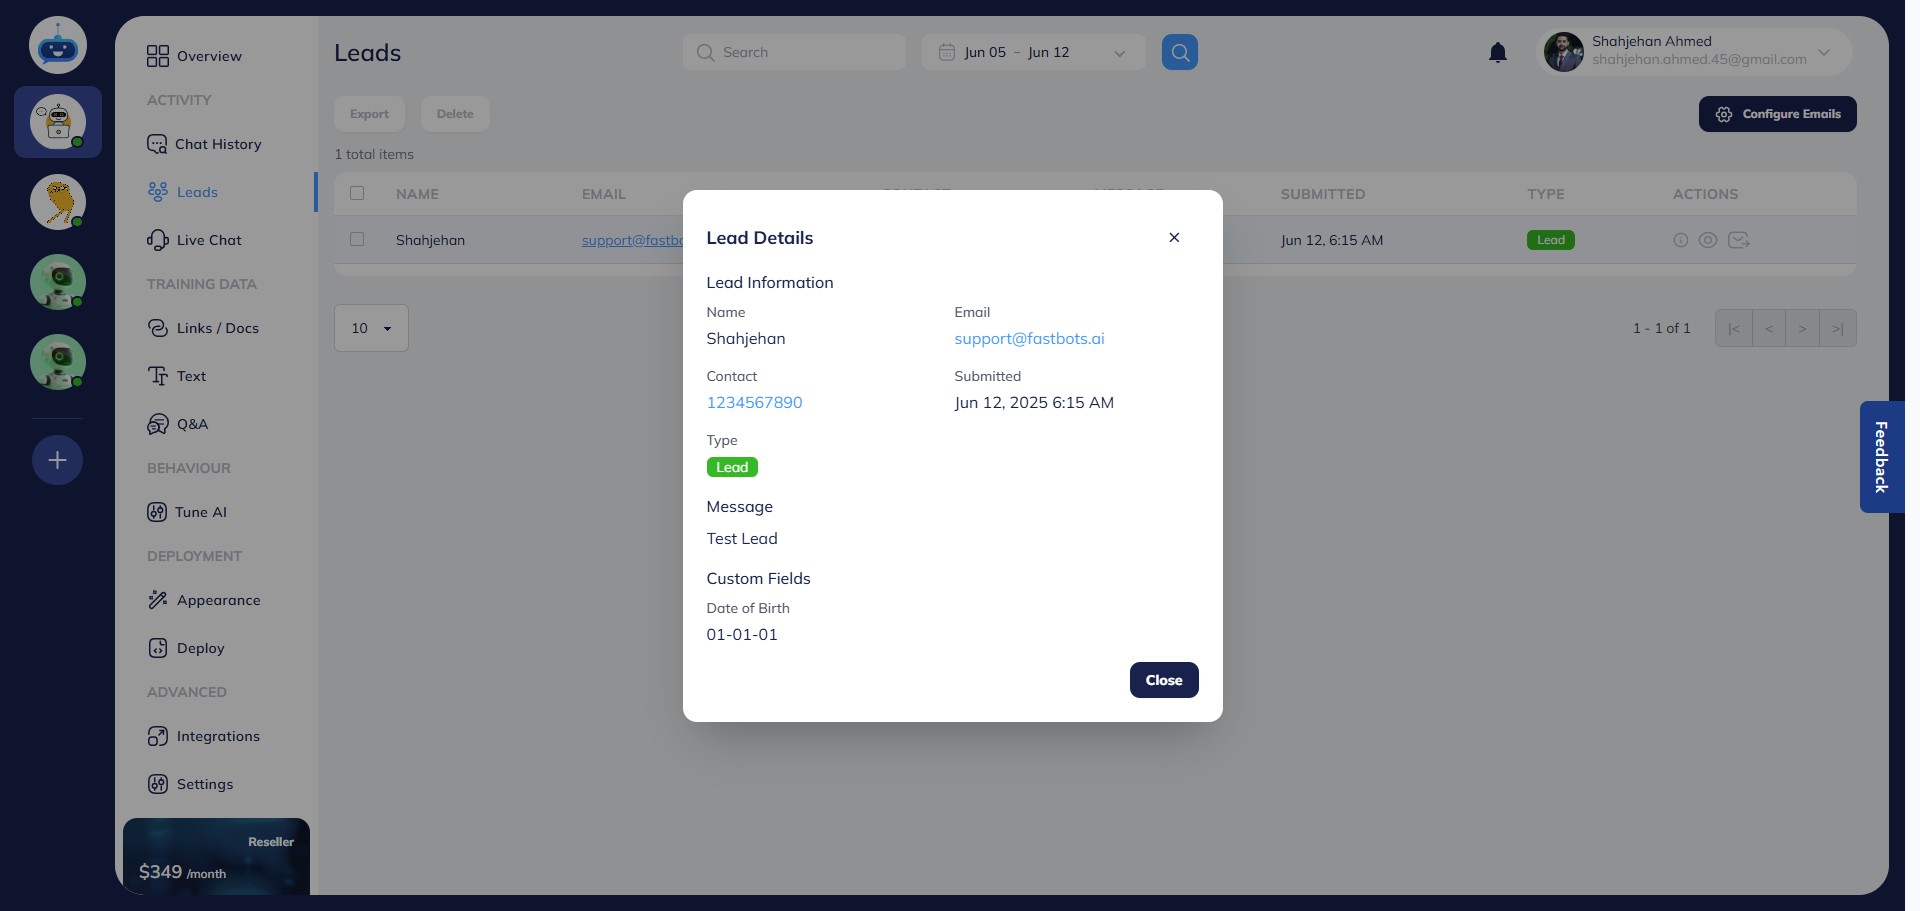
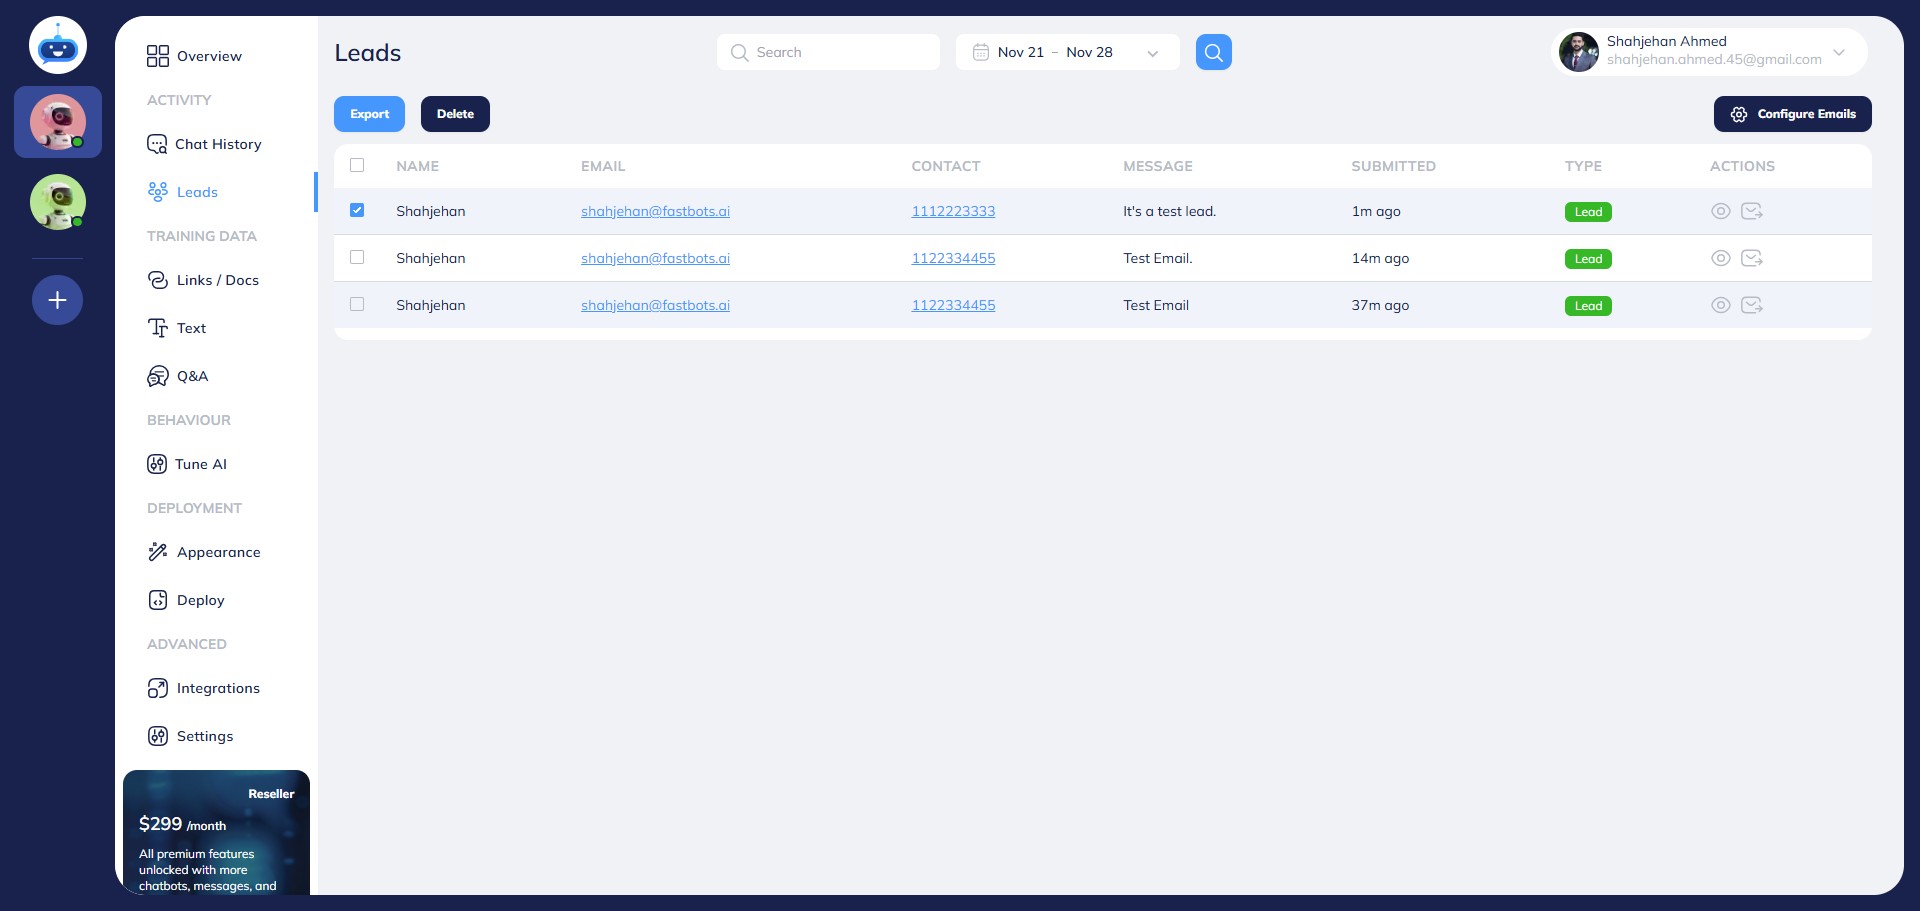
Now, whenever a user submits the lead collection form, the chatbot will store the lead information on the leads page. To see the lead details, go to the Leads page and click on the "View Details" button.
It will show you the complete lead information in a pop-up.
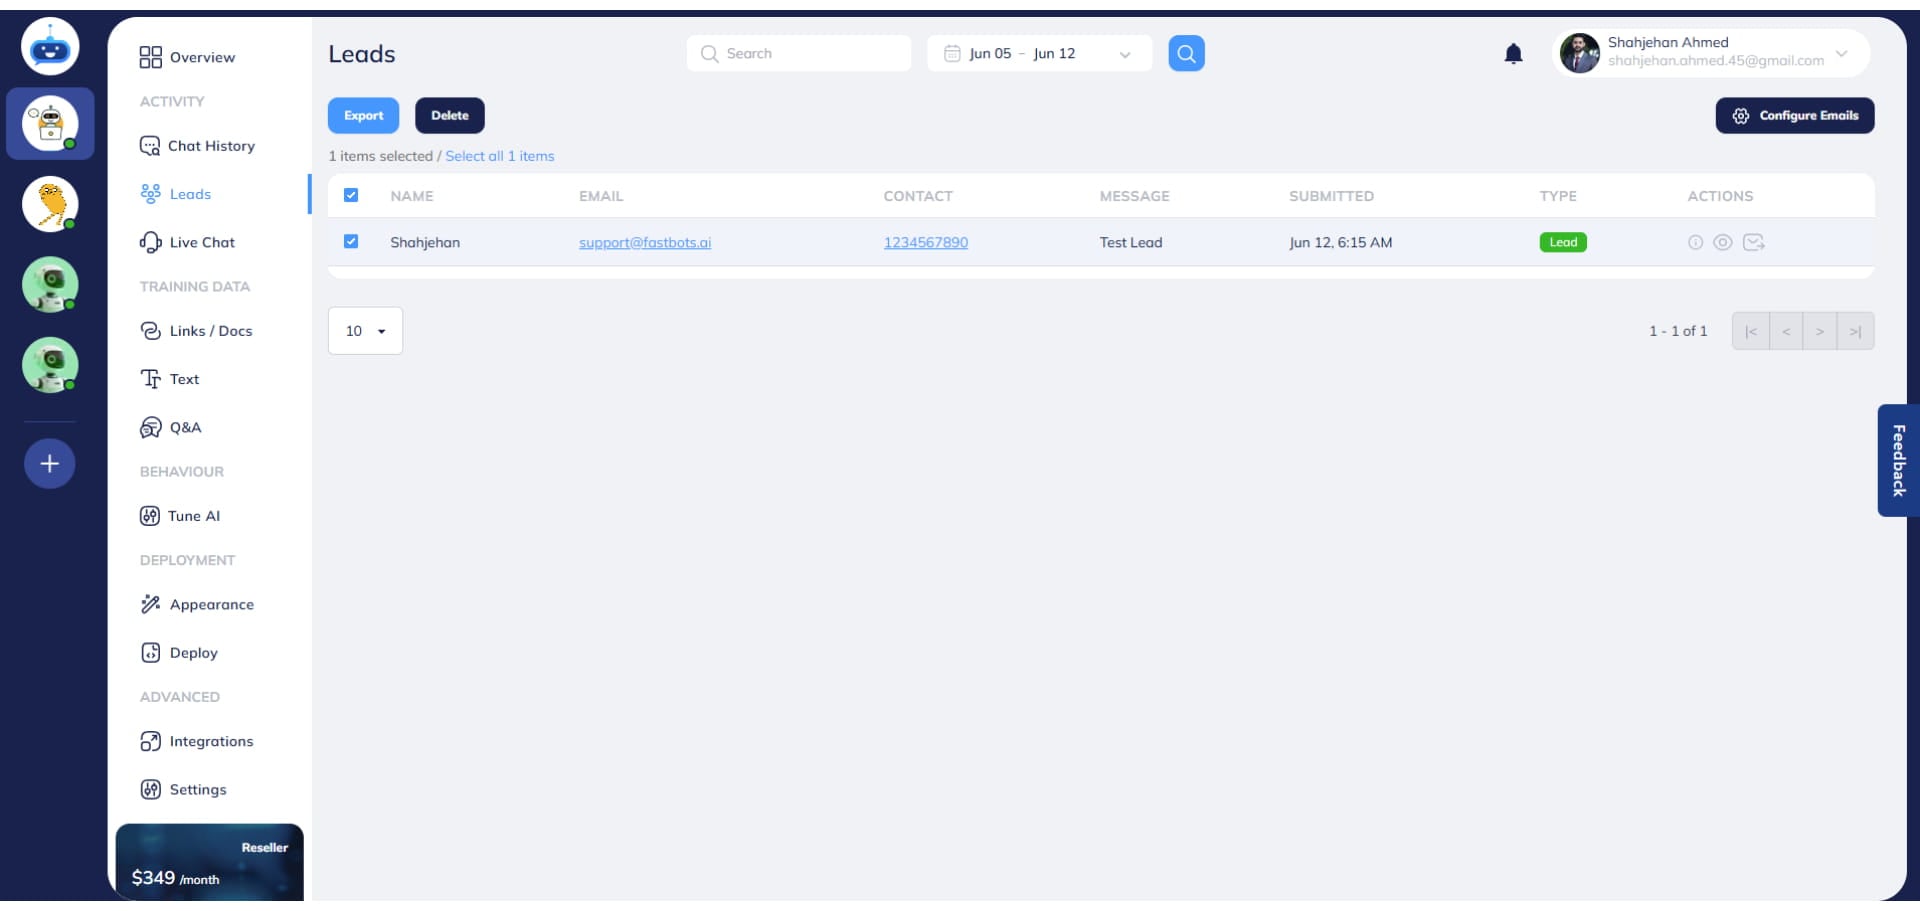
If you want to export the lead information in a document, select the lead by clicking on the checkbox and click on the "Export" button. It will export the lead in a PDF.
This is the pdf format. You can see all the details of the lead. Below the lead information, you will find the chat history.
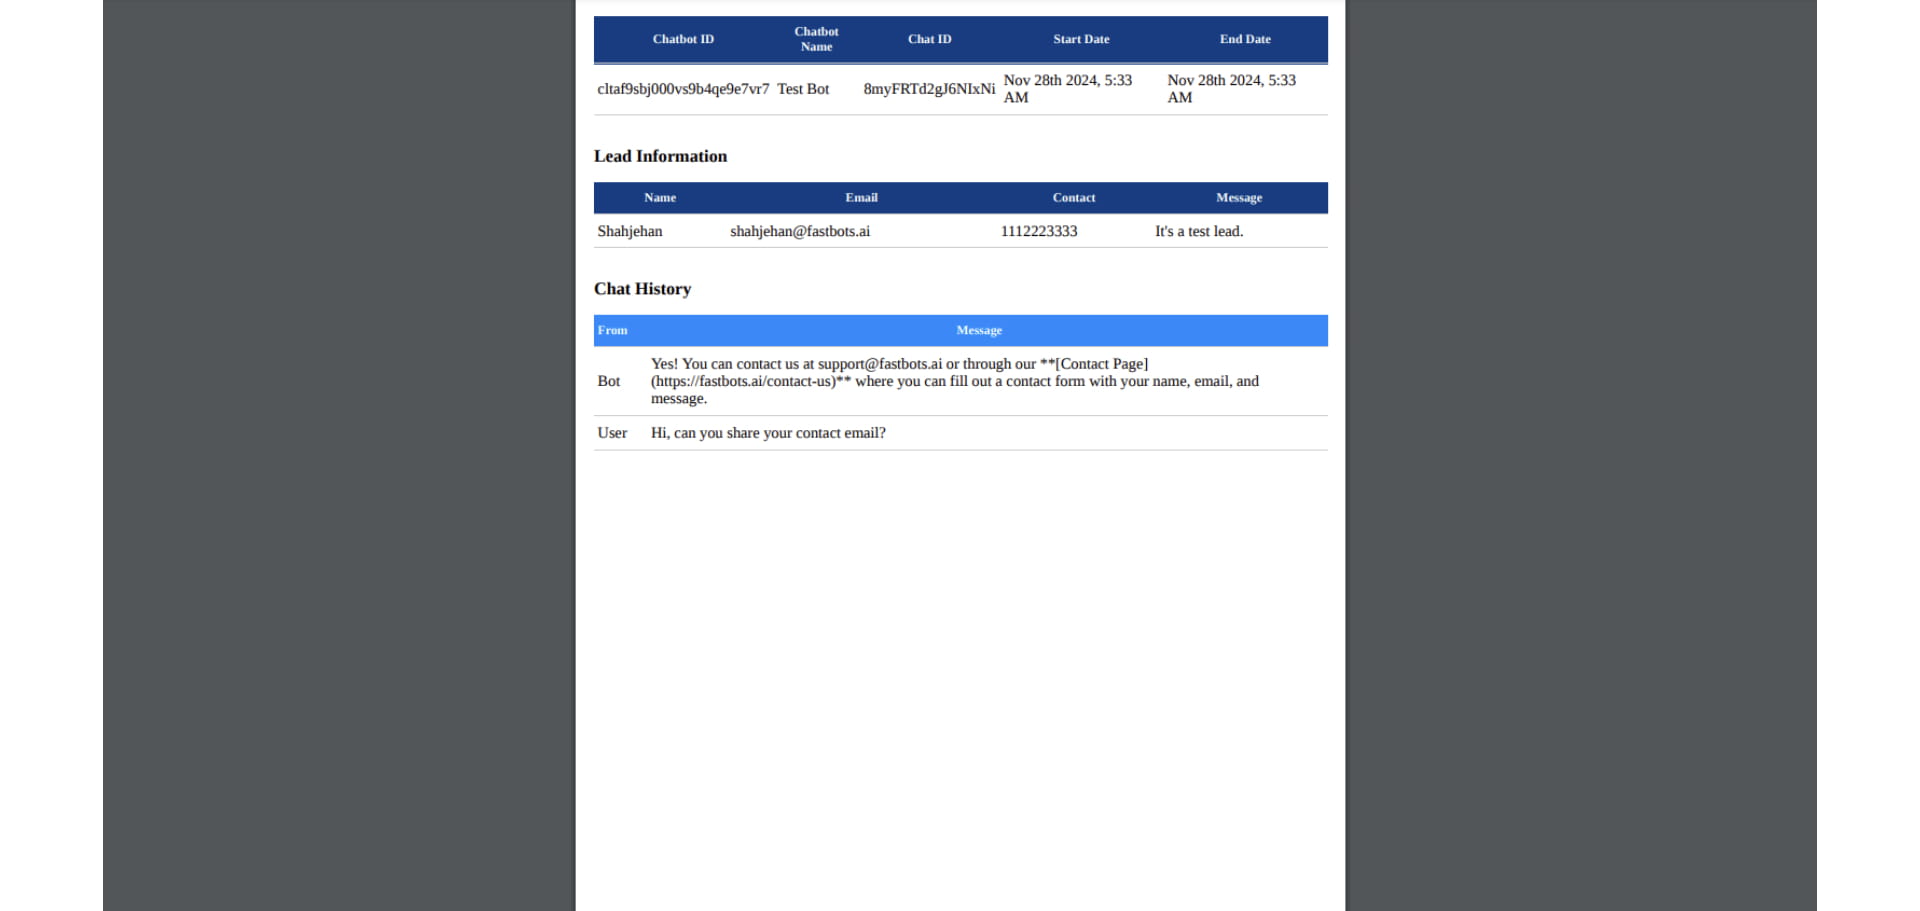
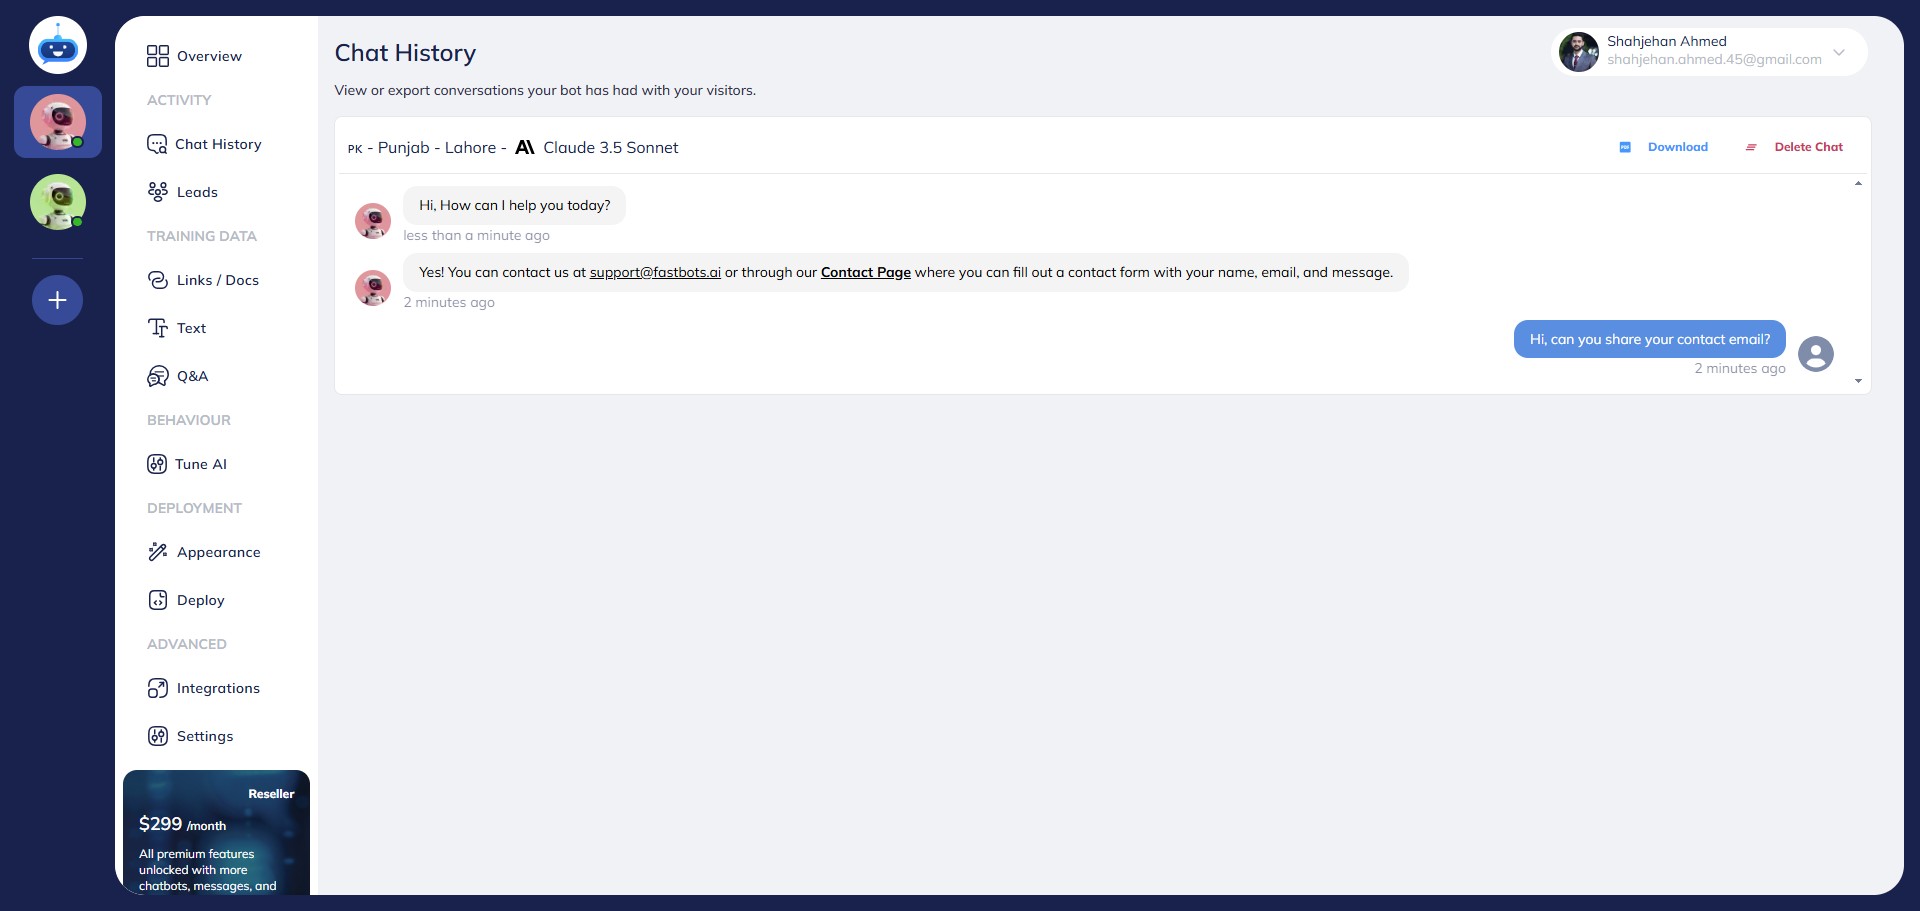
If you want to see the chat history of this lead, click on the "View Chat" icon to see the complete chat this user had with the bot.
It will take you to the chat history page.
As soon as you submit the lead, the lead information will also be sent to the email that you have configured. This is what the email looks like.
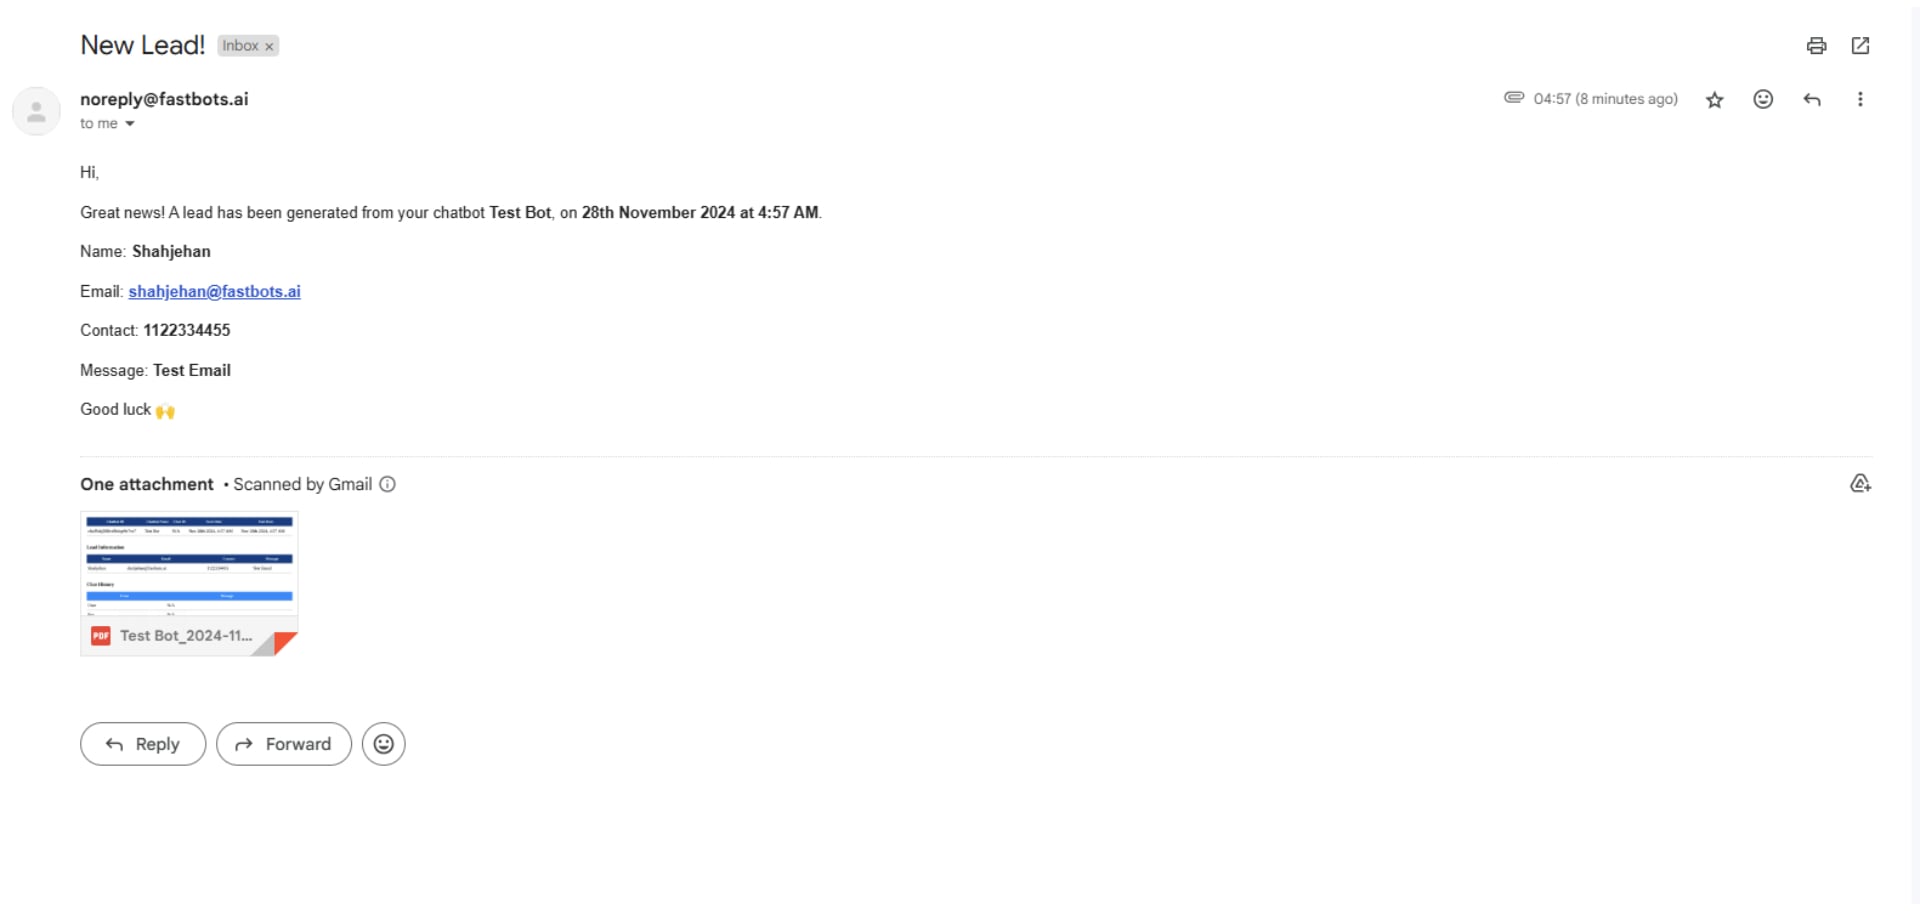
If you want to resend this lead to your email again, just click on the "Resend" icon.
Congratulations!! You have successfully setup your lead collection form and configured it with your email 🚀