How to Customise Your Chat Widget and Enable Voice Conversations
Choose text or voice conversations, customise your chatbot’s appearance and configure the visitor experience. Appearance is now called Chat Widget, under Deployment.
Open your chatbot in FastBots, then select Chat Widget under Deployment. Creating a new bot? Complete the setup wizard first. The wizard currently creates a text chatbot. Afterwards, open Deployment → Chat Widget to enable voice.
, then select **Chat Widget** under **Deployment**.
Creating a new bot? Complete the setup wizard first. The wizard currently creates a text chatbot. Afterwards, open Deployment → Chat Widget to enable voice.](https://assets.guidejar.com/uploads/InTNxHa0Rolzd7t7dfjS/lIb8emhxYeXedUErYKM3uPlaFUX2/c7bebec8-640d-4ecd-b04a-b489942cd05c/1790266103073.png)
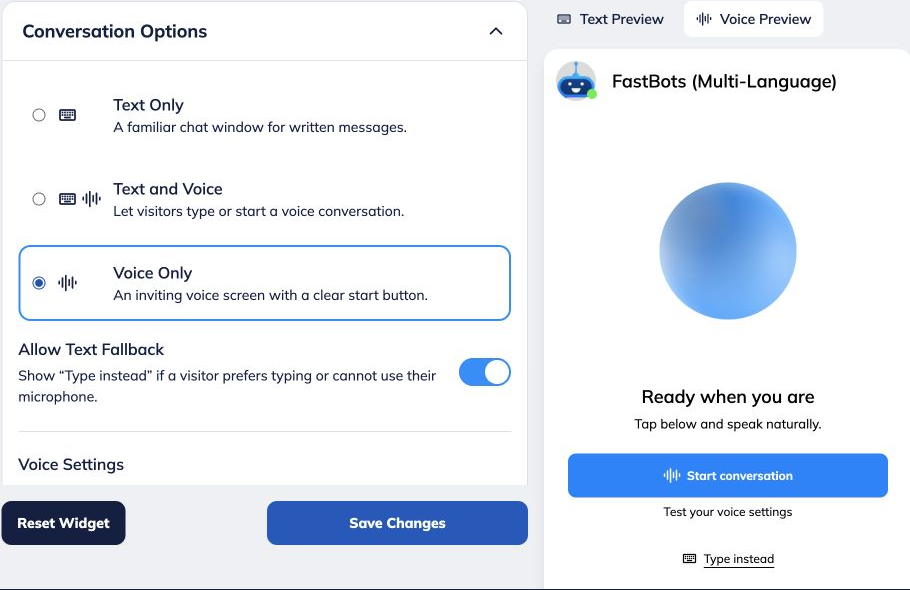
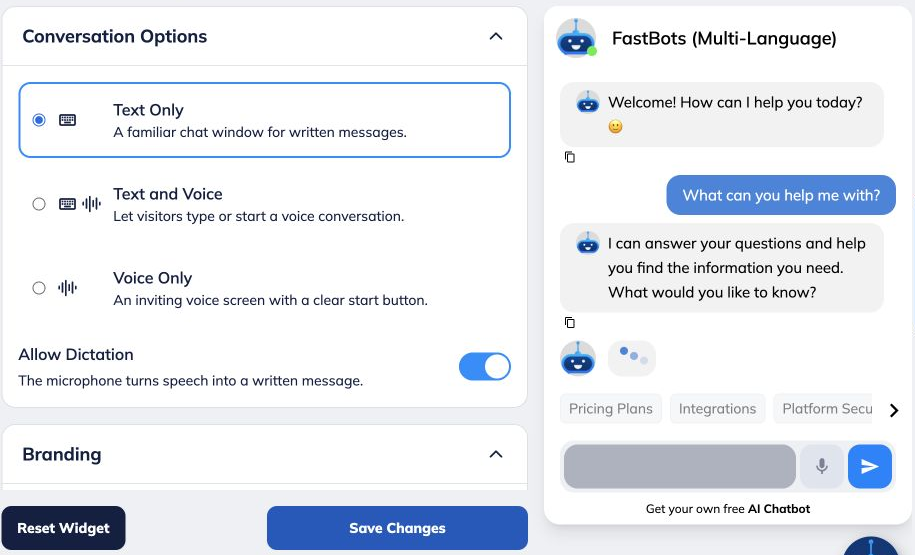
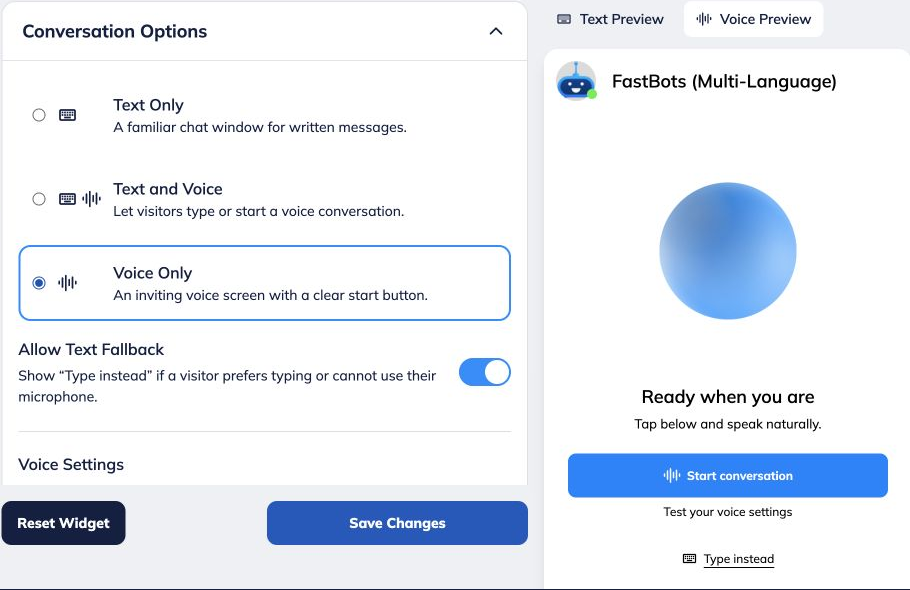
Open Conversation Options and choose your Conversation Mode. • Text Only: visitors send written messages. • Text and Voice: visitors can type or start a voice conversation. • Voice Only: visitors start from a dedicated voice screen, with an optional typing fallback. Allow Dictation converts speech into a written message. To let the bot listen and reply aloud, choose Text and Voice or Voice Only.
Review the usage information in Voice Settings. Voice uses 50 message credits per minute, calculated by the second. Voice tests and Preview Speaking Style use the same rate. A two-minute voice session uses 100 message credits.
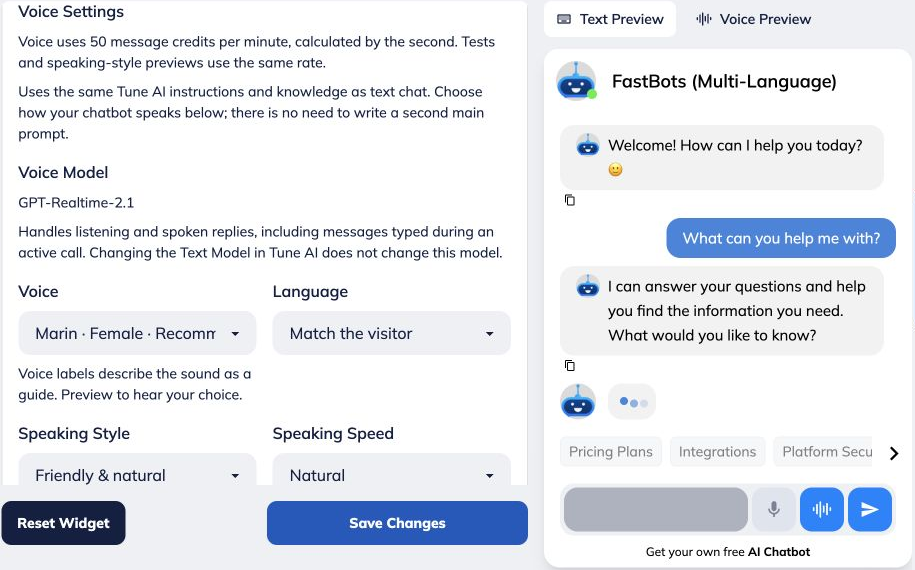
Choose a Voice and Language. The voice choices include Marin, Cedar, Alloy, Ash, Ballad, Coral, Echo, Sage, Shimmer and Verse. Marin and Cedar are marked as recommended in the current interface. For Language, choose Match the visitor or a specific language. Voice uses the same knowledge and main Tune AI instructions as text chat. There is no need to train a second bot or write another main prompt. The Voice Model handles listening and spoken replies, including messages typed during an active call. Changing the Text Model in Tune AI does not change the voice model.
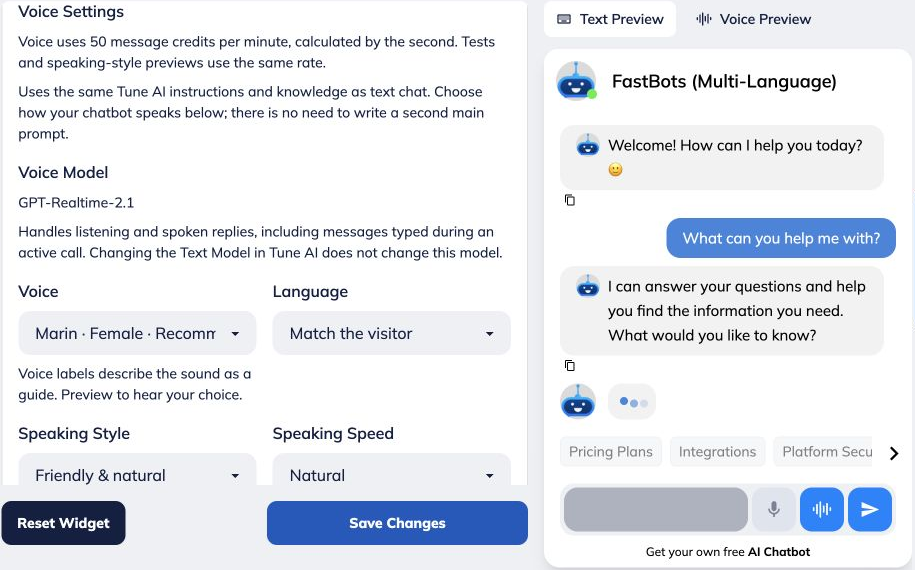
Choose your Speaking Style and Speaking Speed. Styles: Friendly & natural, Professional, Playful & upbeat, or Calm & reassuring. Speeds: Relaxed, Natural, or Brisk. Friendly & natural with Natural speed is a useful starting point for a general support bot.
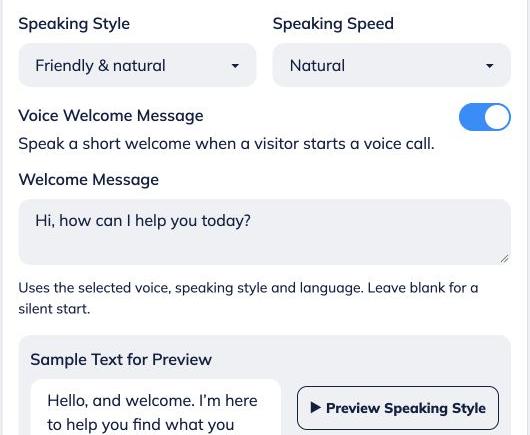
Enable Voice Welcome Message and enter a short Welcome Message. For example: “Hi! I’m your virtual assistant. What can I help you with today?” The bot speaks this greeting when a visitor starts a call, using your selected voice, style and language. Leave the message blank for a silent start. This is separate from the written welcome and the voice start-screen heading.
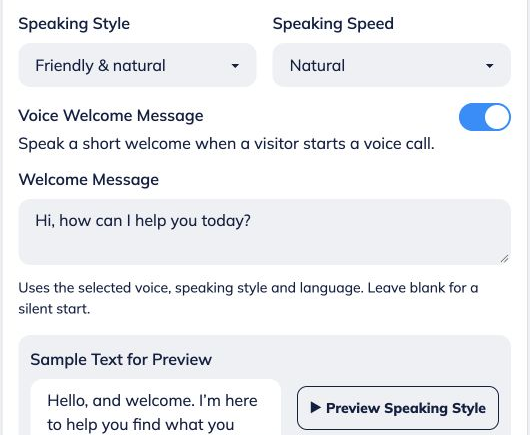
Enter Sample Text for Preview, then select Preview Speaking Style to hear the delivery. No microphone is needed. This sample is only for the preview and does not replace your welcome message. Preview playback uses message credits at the voice rate.
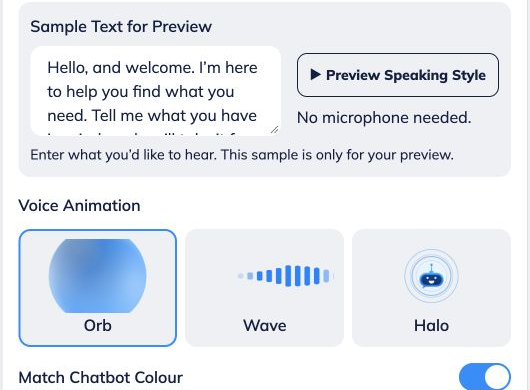
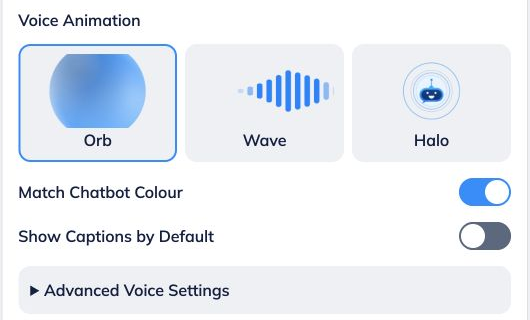
Choose Orb, Wave or Halo under Voice Animation. Use Match Chatbot Colour to coordinate the animation with your bot. Enable Show Captions by Default if you want captions displayed by default during voice conversations.
If you selected Voice Only, customise its start screen. • Enable Allow Text Fallback to show Type instead for visitors who prefer typing or cannot use their microphone. • Under Voice Start Screen, edit Heading and Supporting Text. Leave either field blank to hide it. These fields change the visible start screen, not the spoken welcome.
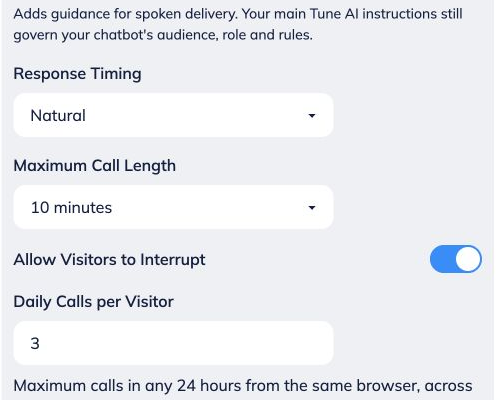
Open Advanced Voice Settings to adjust the conversation. • Additional Voice Instructions: add spoken-delivery guidance, such as “Use short sentences and explain one step at a time.” Keep the main role, audience and rules in Tune AI. • Response Timing: choose Quick, Natural or Patient · more time to pause. • Maximum Call Length: select 1 to 10 minutes. • Allow Visitors to Interrupt: choose whether visitors can interrupt the bot while it speaks. • Daily Calls per Visitor: limit calls from the same browser within any 24 hours, including across new chats. Chat Widget previews are excluded from the daily call count, but still consume credits. Clearing cookies or using another browser resets visitor identification; this is not a verified per-person limit.
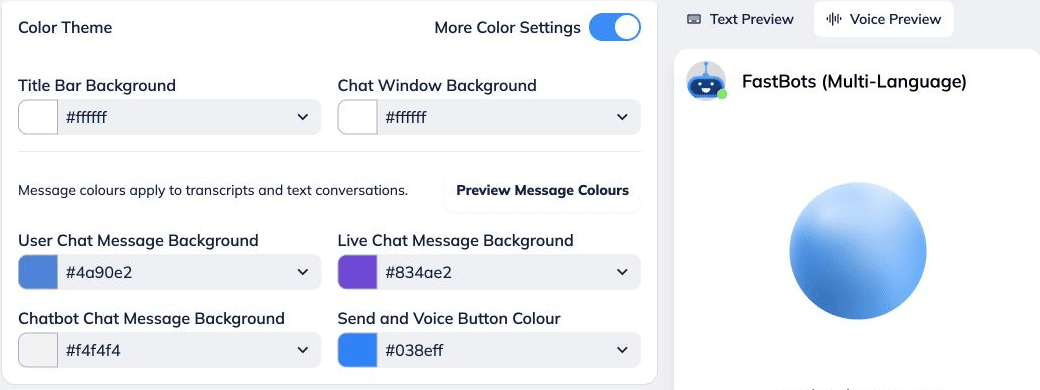
Open Branding to customise the chatbot avatar, start chat icon, launcher position and size, and colour theme. With voice enabled, Send and Voice Button Colour controls those buttons. Message colours apply to text conversations and transcripts.
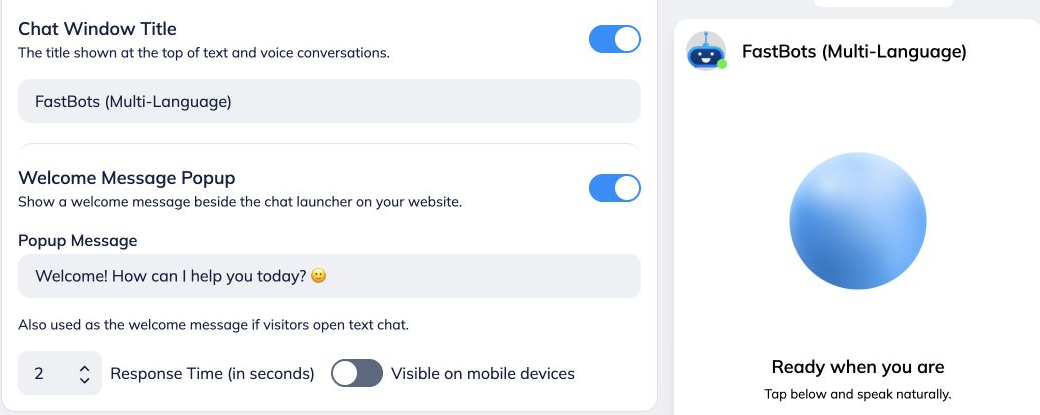
Open Chat Content to change the Chat Window Title and Welcome Message Popup. In text modes, this also contains the written welcome, suggested questions and text input placeholder. Suggested questions start written conversations. In Voice Only, open Text Chat Appearance for settings used when visitors switch to typing. They do not change the voice start screen. Open Attention Grabbers for welcome sounds, launcher animation and automatic opening. In Voice Only, Open Chat Automatically displays the start screen on desktop; visitors still click to start a call. Written-reply sounds stay silent during voice conversations.
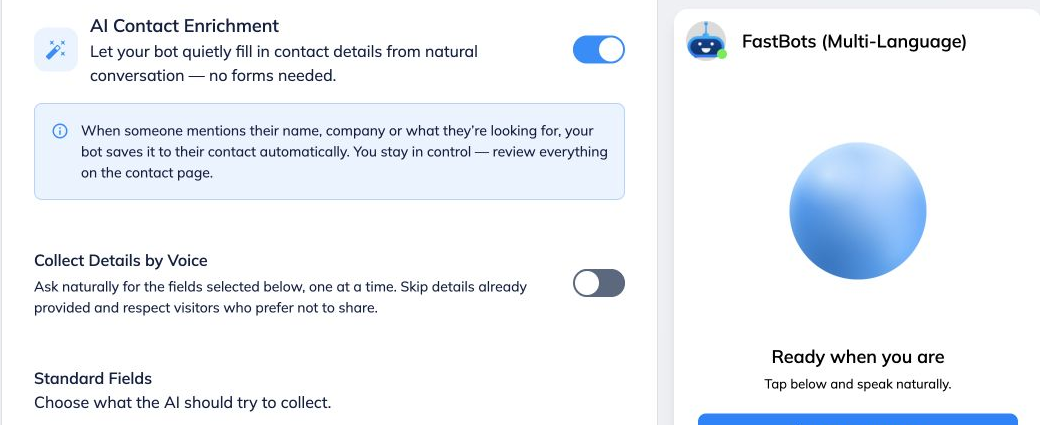
Review File Uploads, Lead Collection, Privacy Policy and White Label. File Uploads controls files shared in text chats and voice calls. Under Lead Collection, use Lead Form for forms before the conversation or offered during voice calls. Message-based form triggers belong to text chat. Under AI Contact Enrichment, where available, Collect Details by Voice lets the bot ask for selected fields one at a time, skipping details already supplied and respecting visitors who decline. Privacy Policy adds your policy link. White Label contains the branding controls available to your account.
Check Text Preview and Voice Preview, then click Save Changes when you are happy with the configuration.
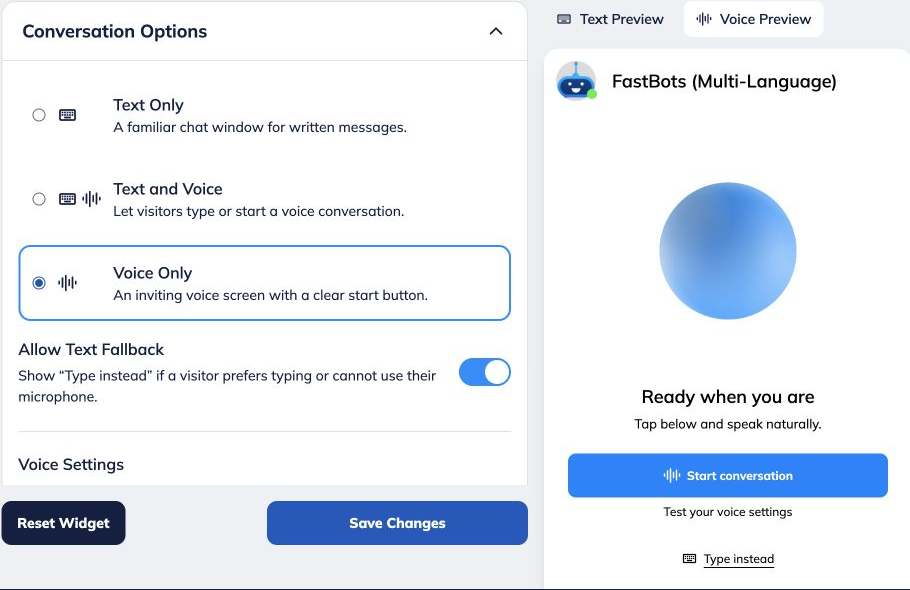
Try the visitor experience. Start a call Select Start conversation in Voice Preview, or Start voice conversation in a Text and Voice widget. Allow microphone access when prompted. Check the experience • Ask a question covered by your bot’s training. • Listen to the reply and check the chosen language. • If text fallback is enabled, try Type instead. Using the bot on your website? Follow the relevant Deploy guide, then check the voice experience on your website too. If speech is unavailable Check that voice is enabled and saved, microphone permission is allowed, and the visitor’s microphone is available. In Voice Only mode, enable Allow Text Fallback to offer a typing option.