

How to Install FastBots on a Website Built With Sanity (Headless CMS)
Follow these simple steps to install your chatbot on a site built with Sanity.
How to Get Your FastBots Chatbot Code
Before installing your chatbot on any platform, you’ll need your widget code.
Log in to FastBots.
Select the chatbot you want to install.
Click Deploy in the left-hand menu.
Scroll to Add to a Website.
Copy the script code using the copy icon.
You’ll paste this code into your website builder so the chatbot appears across all pages.
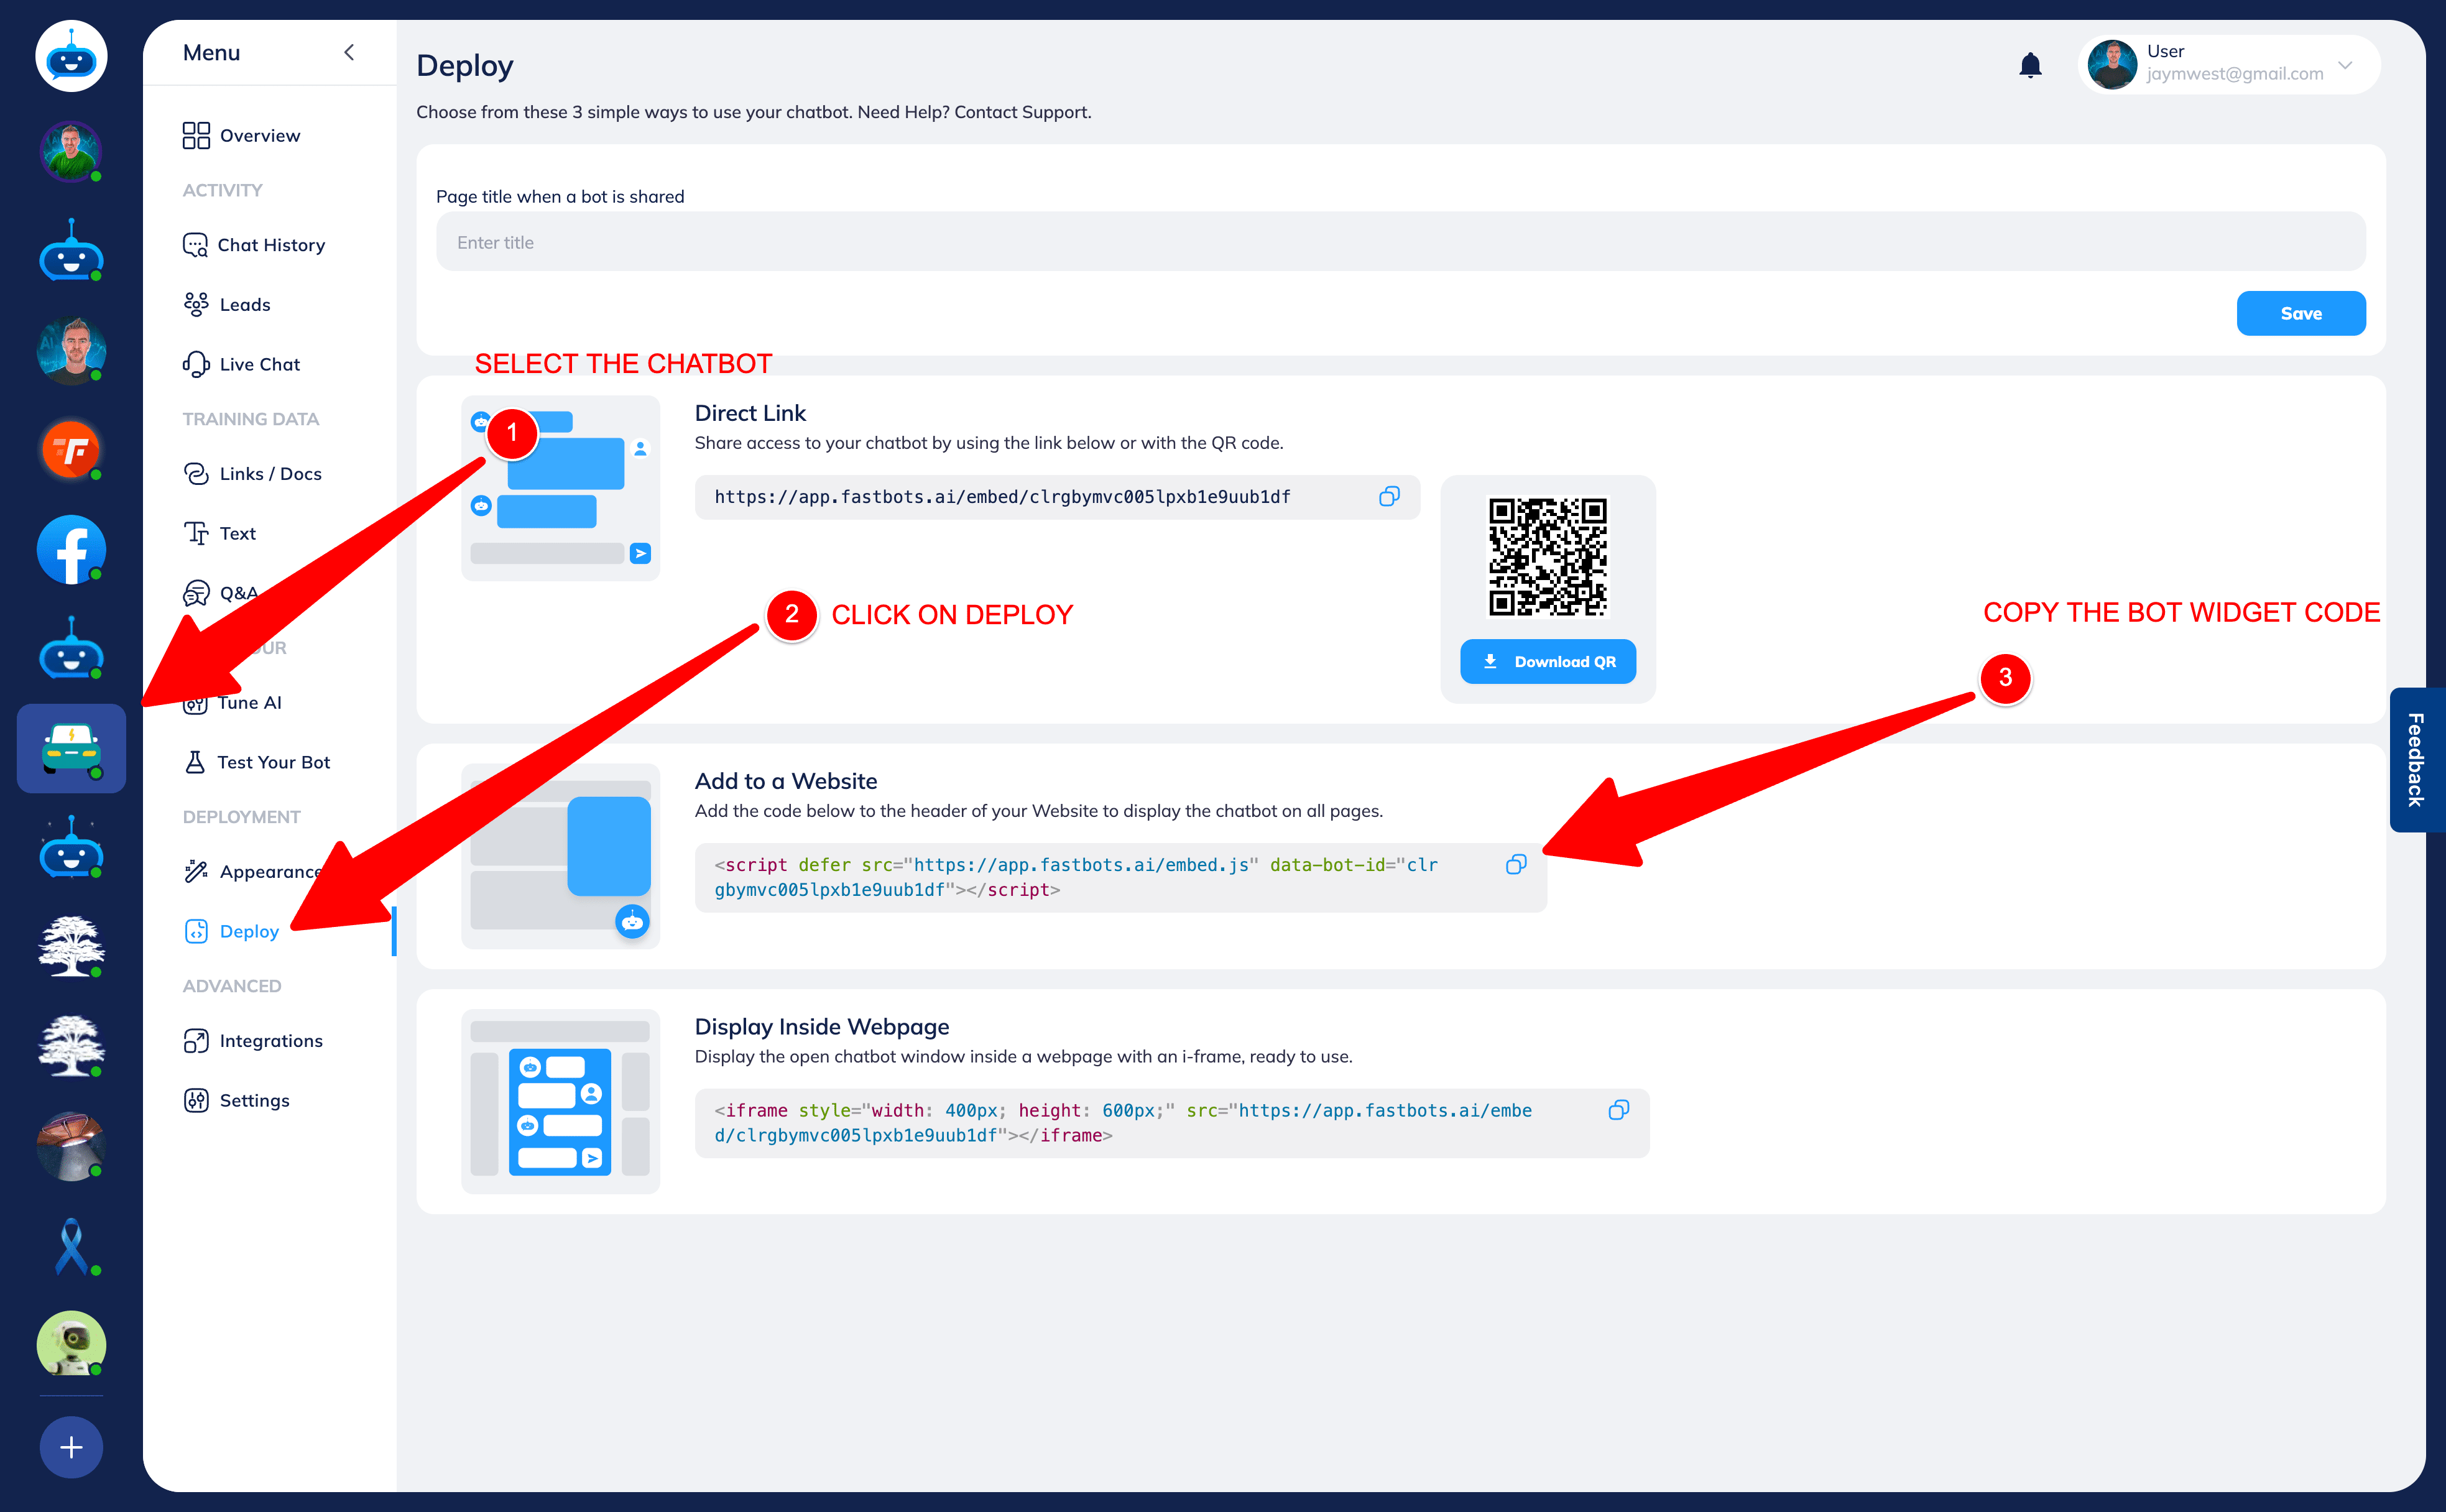
Step 1 — Add the script to your frontend project
Sanity is a headless CMS, so the script is added in your frontend code, not inside Sanity Studio.
If your frontend is Next.js:
- Open the
app/layout.jsorpages/_document.jsfile (depending on your setup). - Inside the
<head>section, paste your FastBots script code:<script defer src="https://app.fastbots.ai/embed.js" data-bot-id="YOUR-BOT-ID"></script>
Enable and test voice In FastBots, open Deployment → Chat Widget → Conversation Options. Choose Text and Voice or Voice Only, configure your voice settings and select Save Changes. After installation, open your website or shared chatbot link as a visitor. Start a voice conversation, allow microphone access and check that you can hear a reply. If you enabled text fallback, check Type instead too. Voice tests consume message credits. See the Chat Widget and Voice guide for the full setup. The setup wizard still creates a text chatbot; voice is enabled afterwards.